Plugpro (React Native App)
Car Charging Station
Thank you for your purchase! If you have any questions that you feel should have been in this document,
please feel free to contact us through our Support.
Thanks!
Also you'll need some knowledge of React Native to edit this app.
For help getting started with React Native, view our online
documentation.
Version: 1.0
Setting Up and Config
Prerequisites
This document expects users to have a basic knowledge of Native App development.
Environment Setup
Fresh Setup on MacOS
- Android - https://reactnative.dev/docs/environment-setup?os=macos&platform=android
- iOS - https://reactnative.dev/docs/environment-setup?os=macos&platform=ios
Fresh Setup on Windows
- Android - https://reactnative.dev/docs/environment-setup?os=windows&platform=android
- iOS - iOS Development is not supported on Windows platform
Note: We do not support the issues related to this step. You can check the official docs or search on Google to get solutions regarding any issues faced related to this step and ensure that you can run a simple React Native first before you run and start working on the app source code.
Official Docs - https://reactnative.dev/docs/environment-setup
iOS Setup
Install native packages:
Run the app using terminal:
Run the app using Xcode:
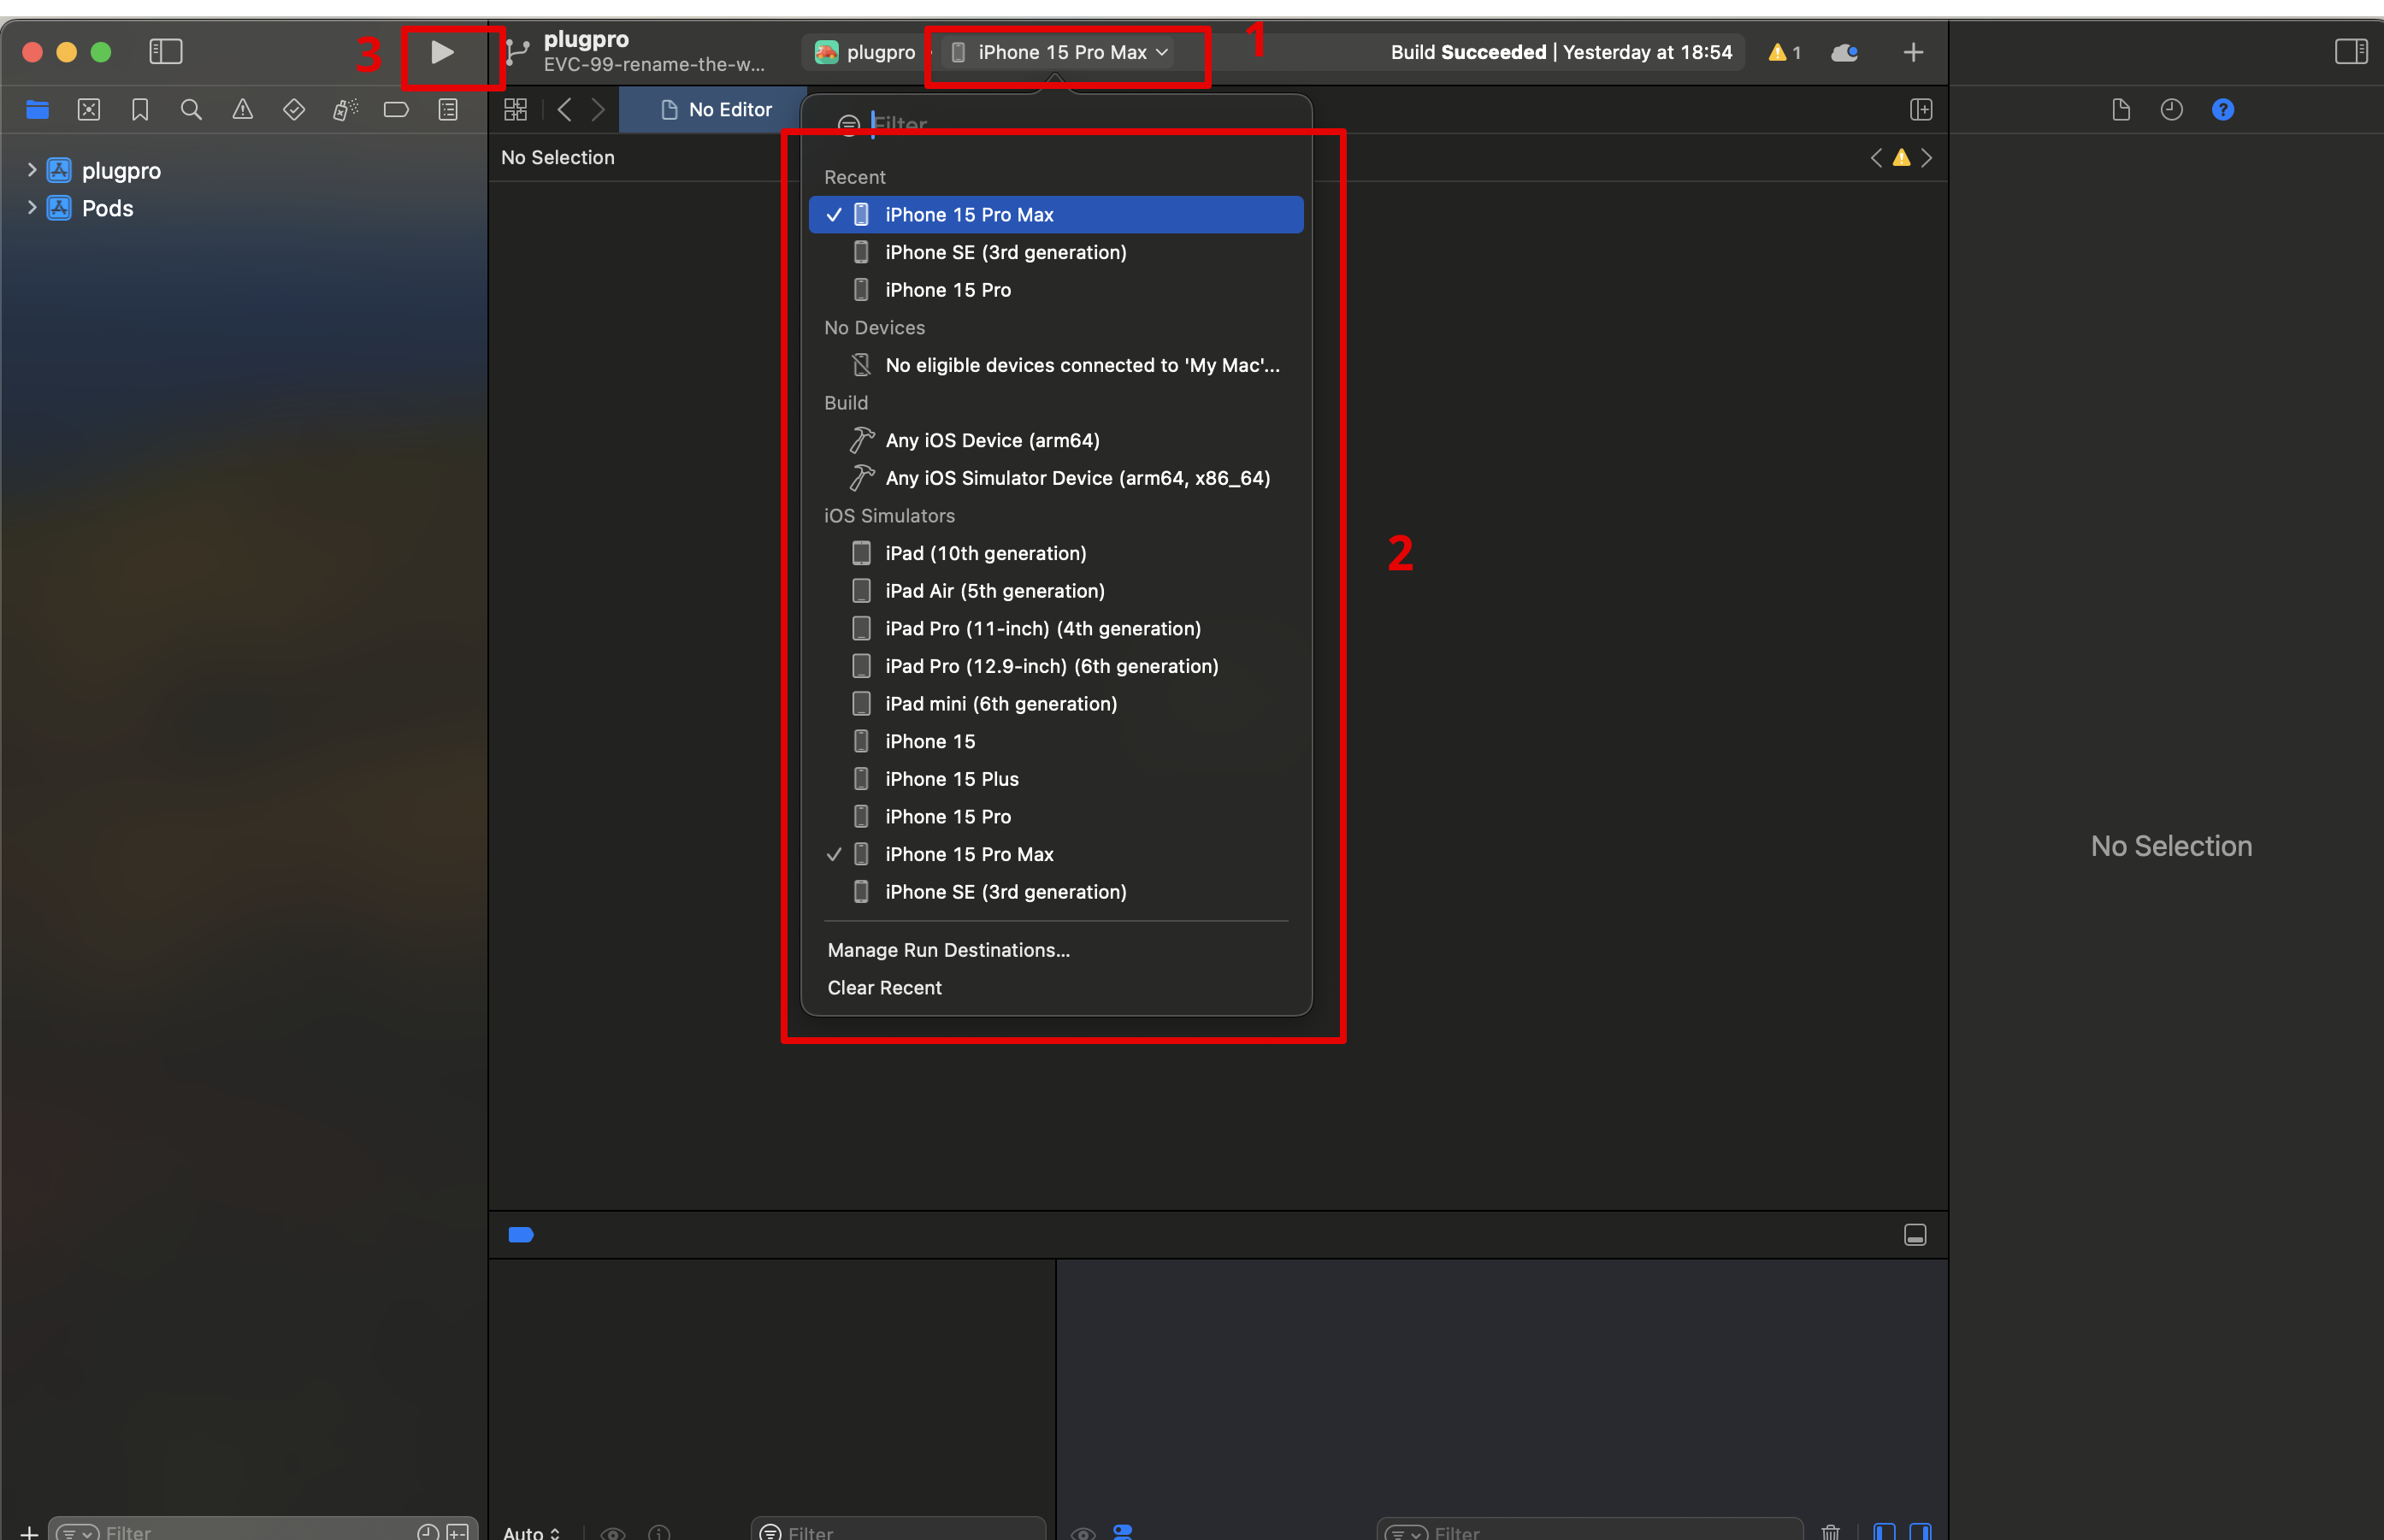
- From the project folder open '{project-folder}/ios/plugpro.xcworkspace' file in Xcode then Click on the play button in the Xcode toolbar to build and run your app. Xcode will compile your React Native app and launch it on the selected simulator
- Here you can choose your desired simulator device from the "Devices" dropdown menu.
I am describing below with a picture for help you
- By hitting this dropdown will open a modal
- From this modal you can choose your desired simulator
- Click on the play button
Configuring iOS
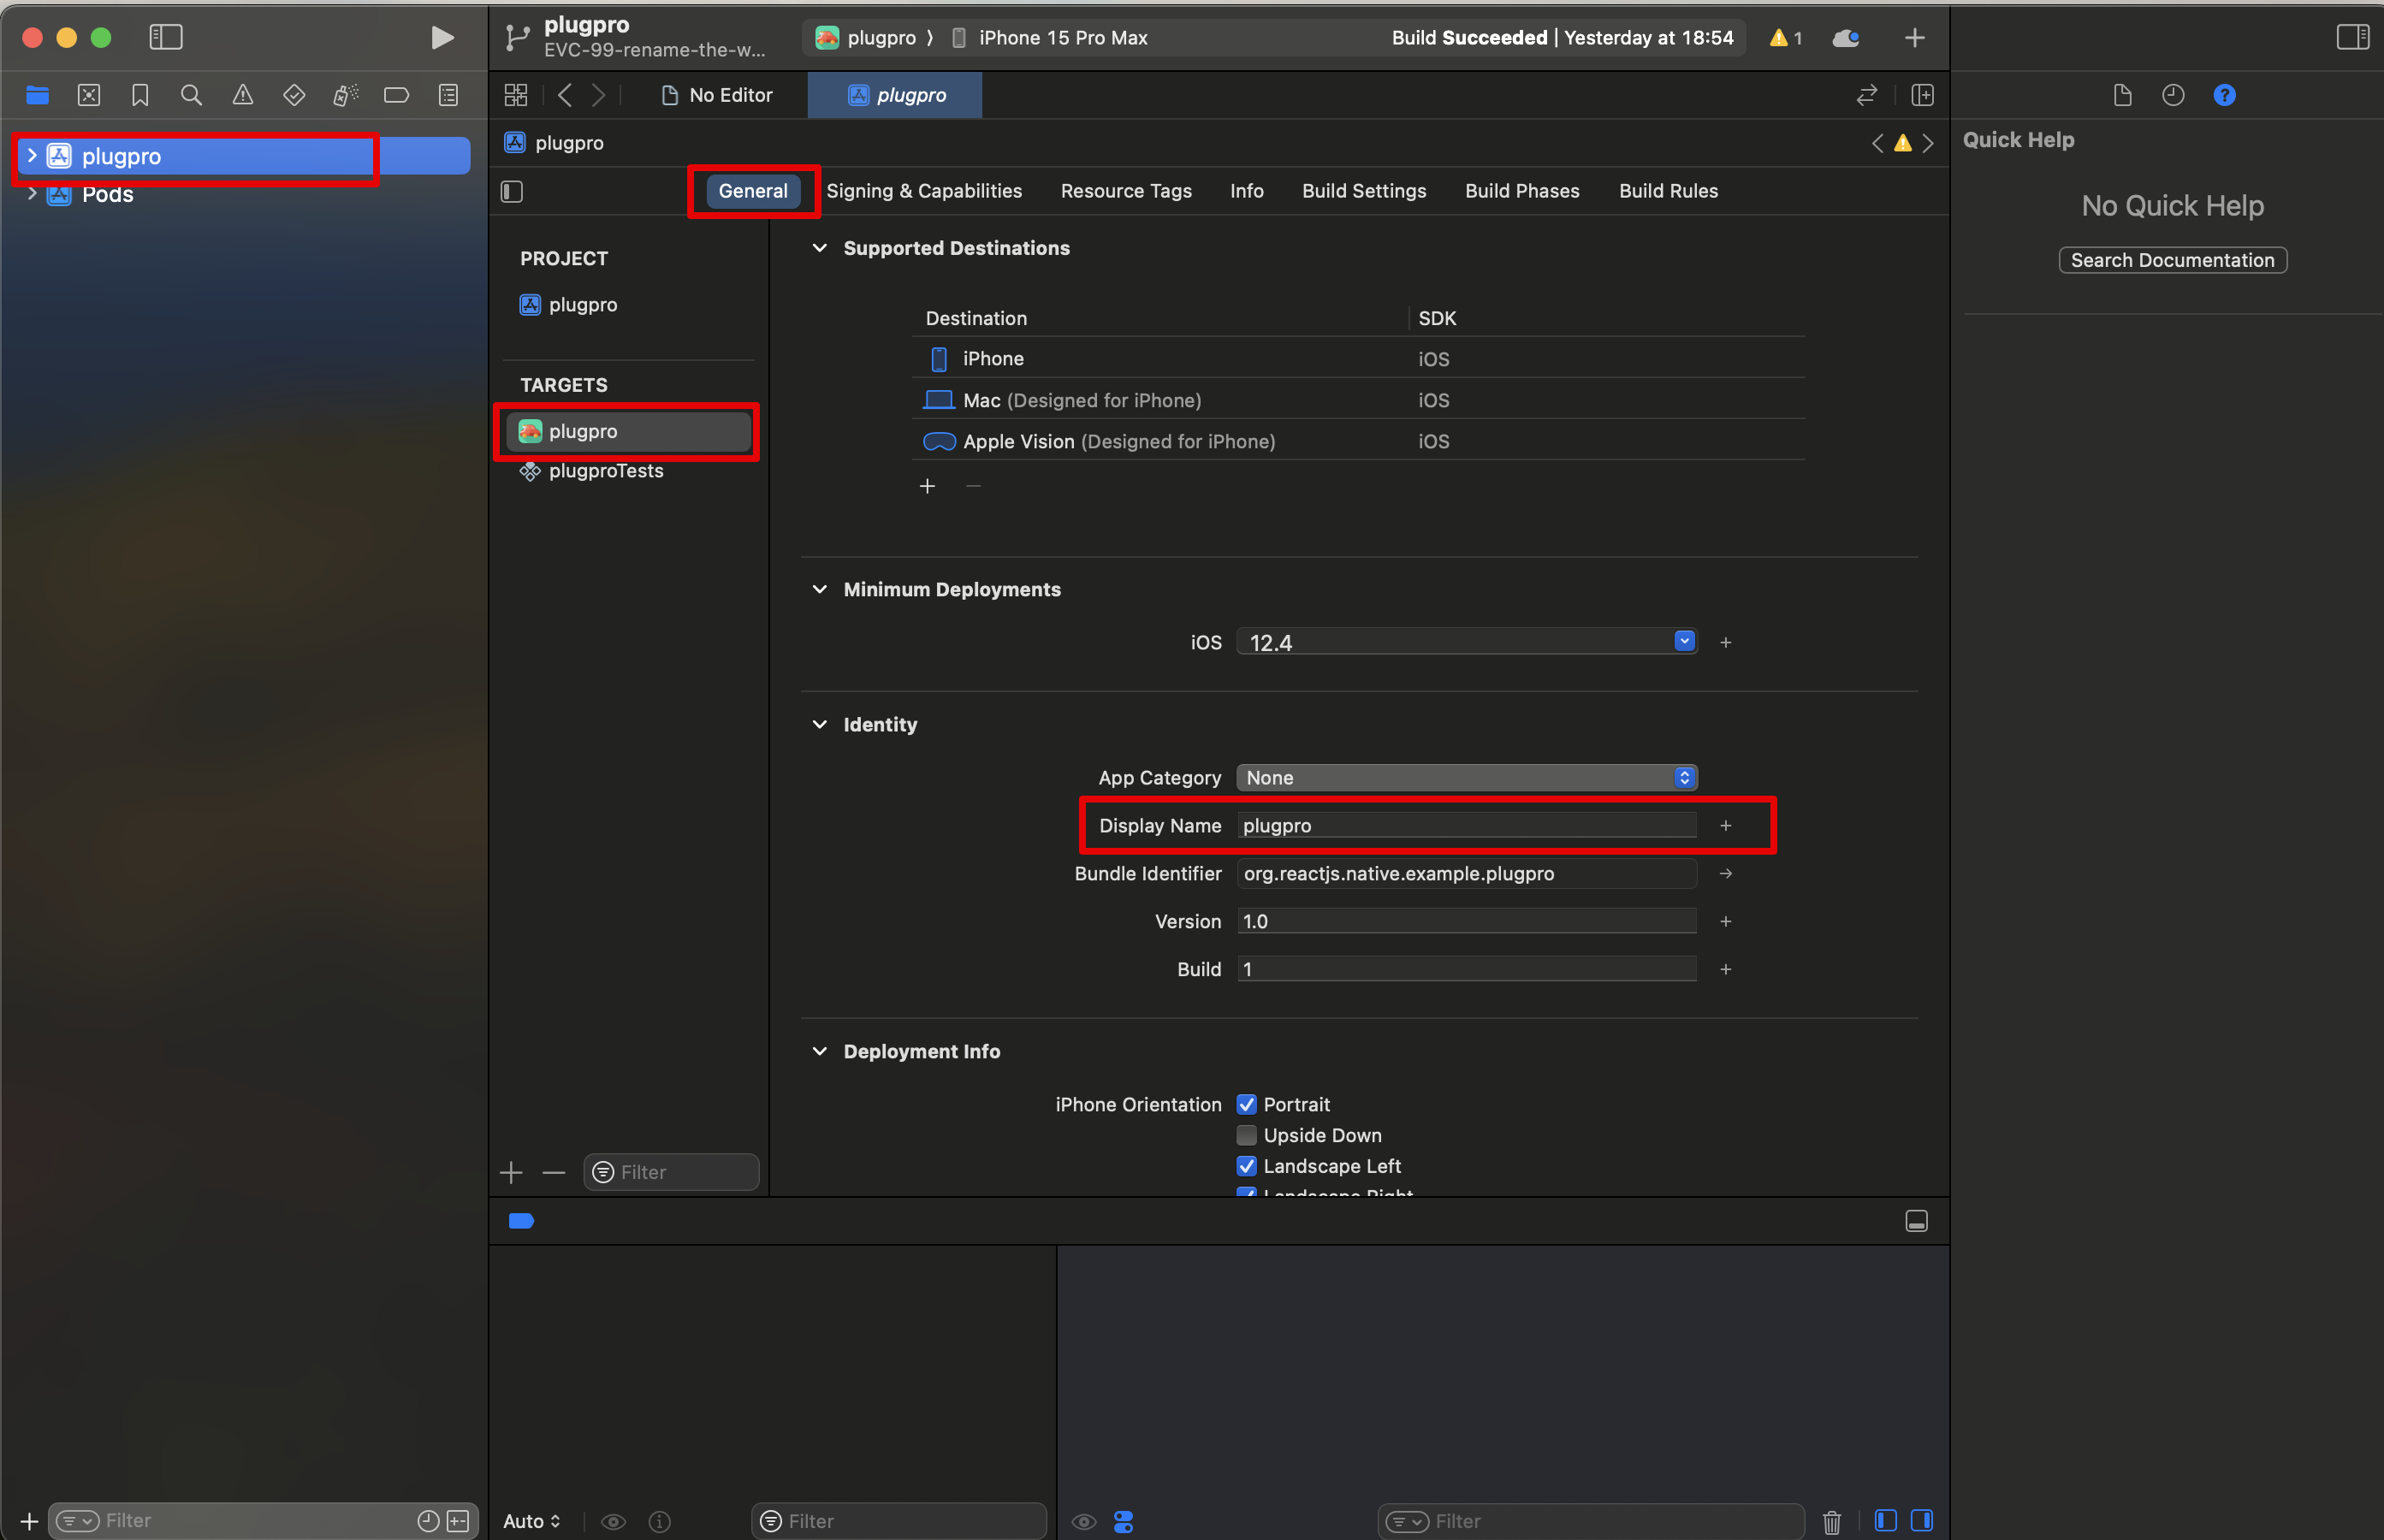
Change App Name
Open '{project-folder}/ios/plugpro.xcworkspace' from the project folder in Xcode or go to terminal then run 'xed -b ios' then you can change
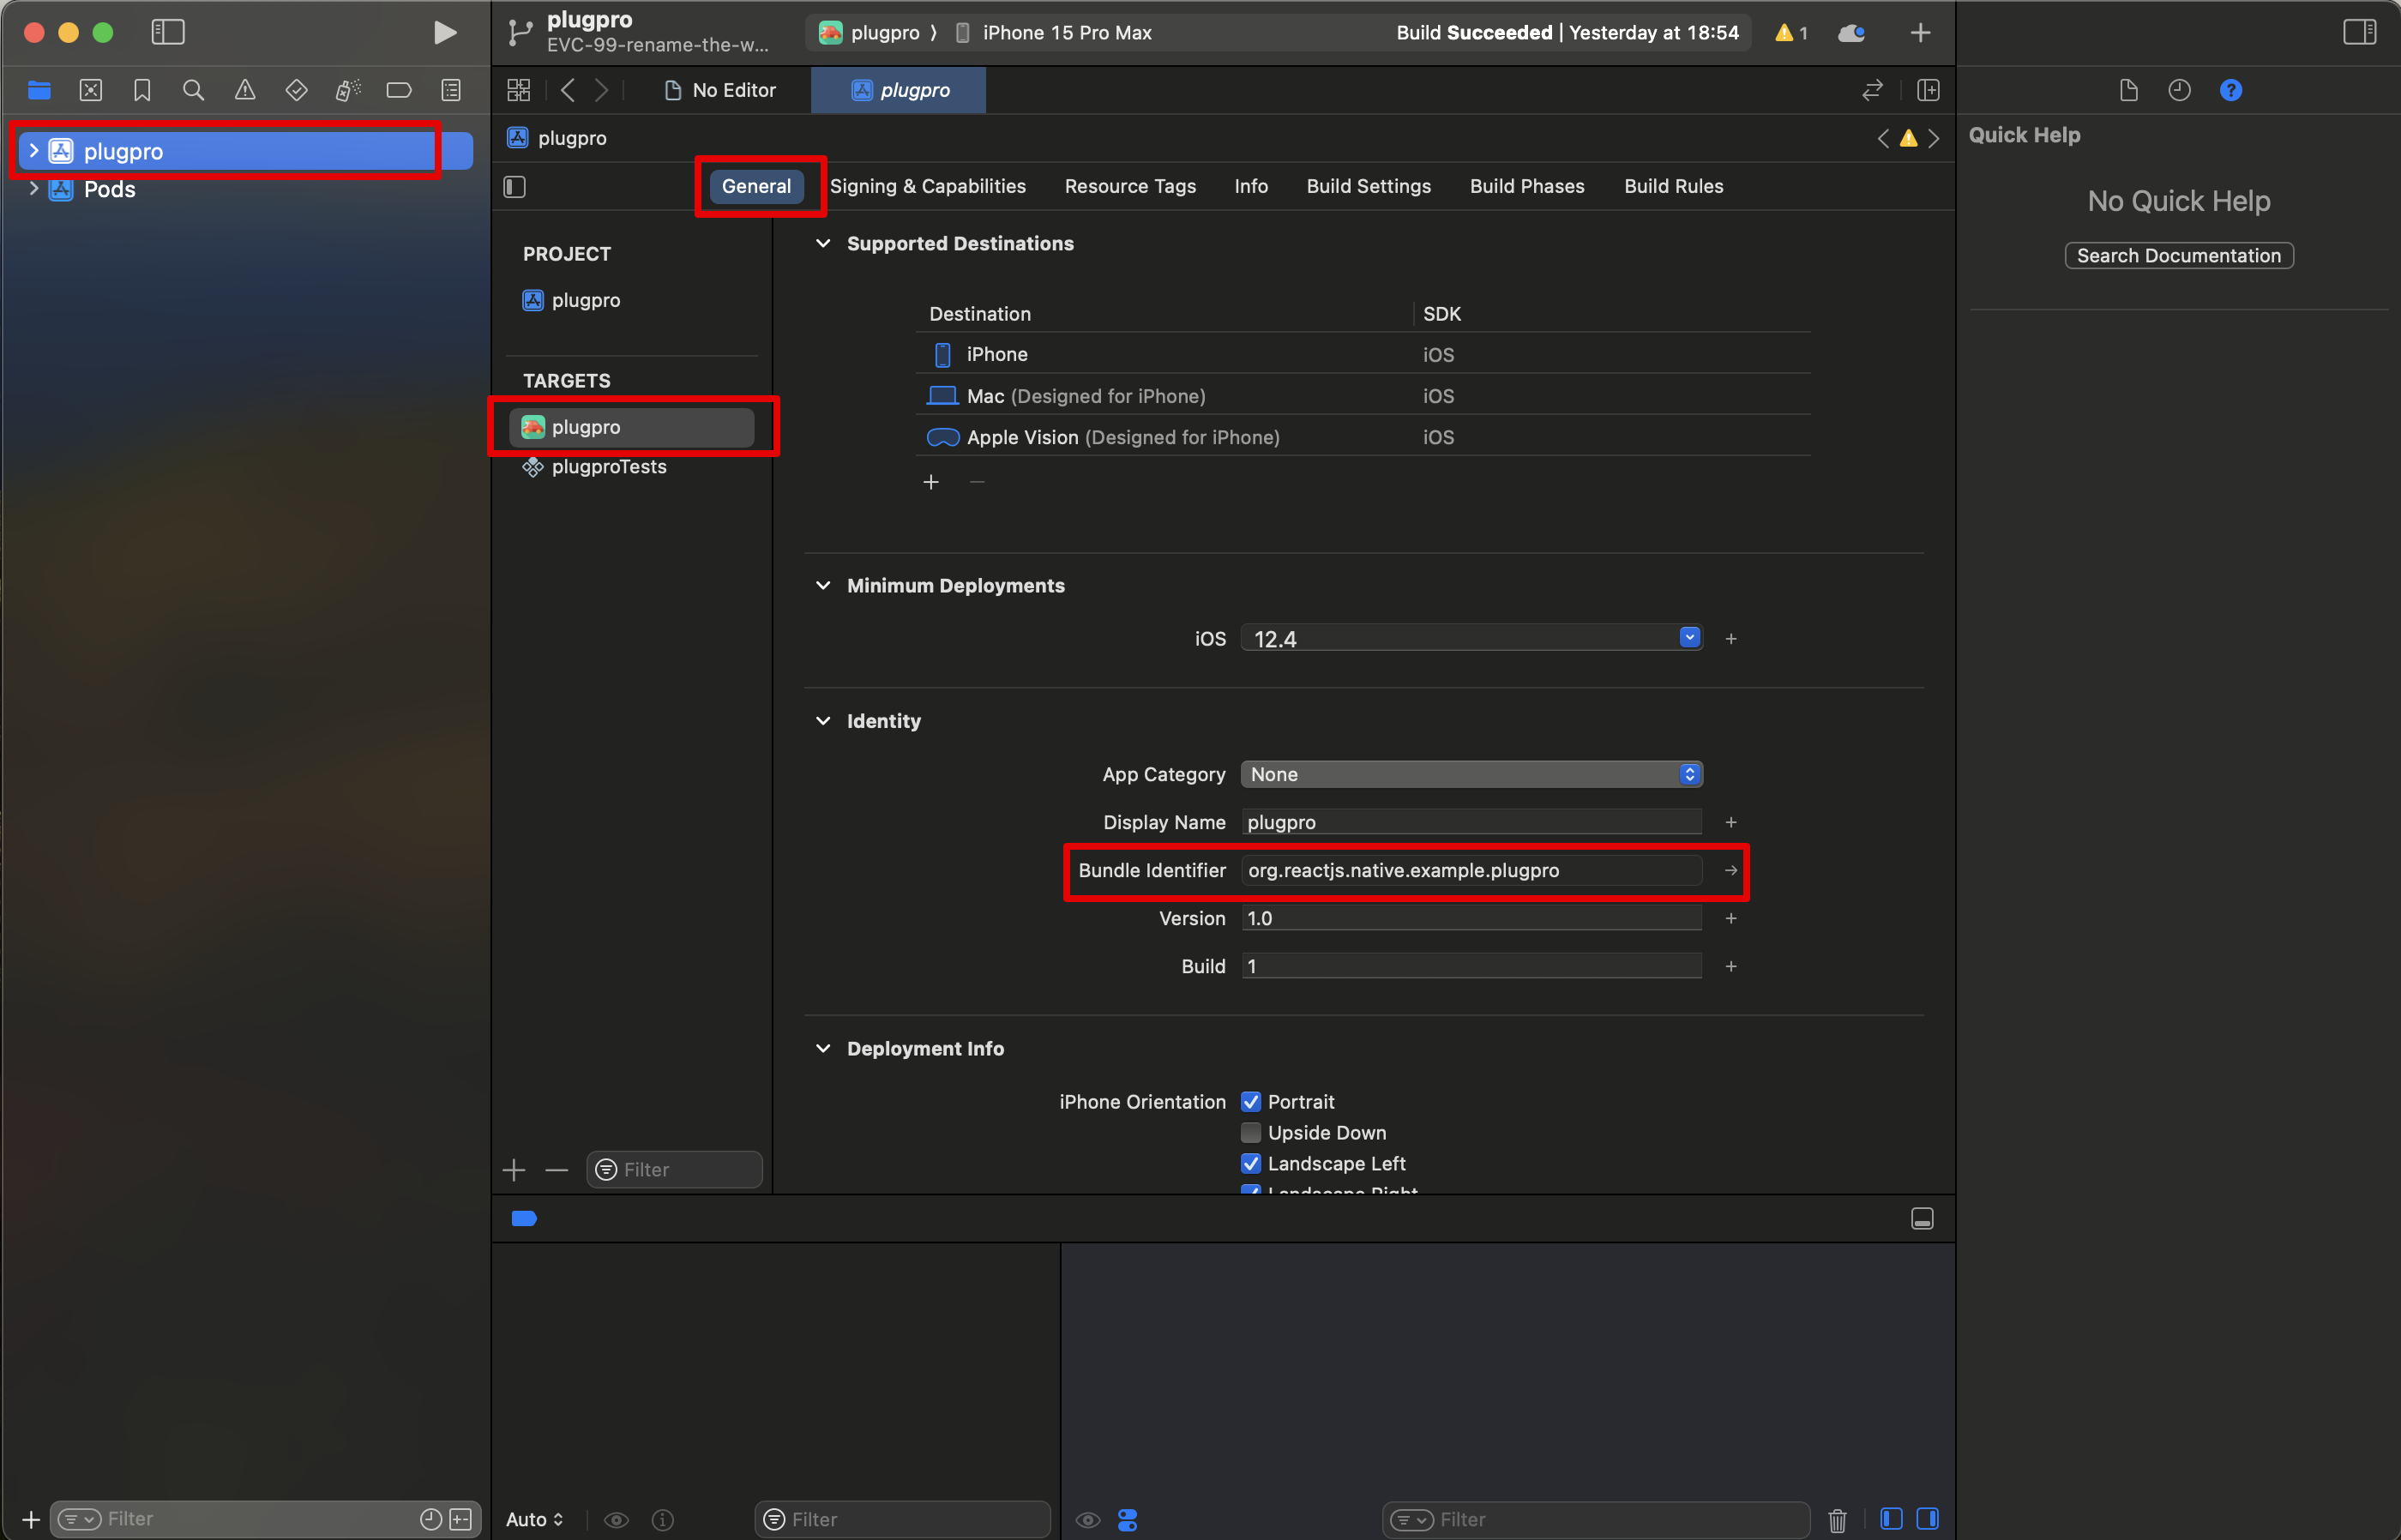
Change Bundle Identifier
The bundle identifier is the unique string that identifies your application to the system.
Bundle identifiers are usually (not always) written out in reverse DNS notation (I.e com.myCompany.myApp).
You can bundle Identifier change under app name.
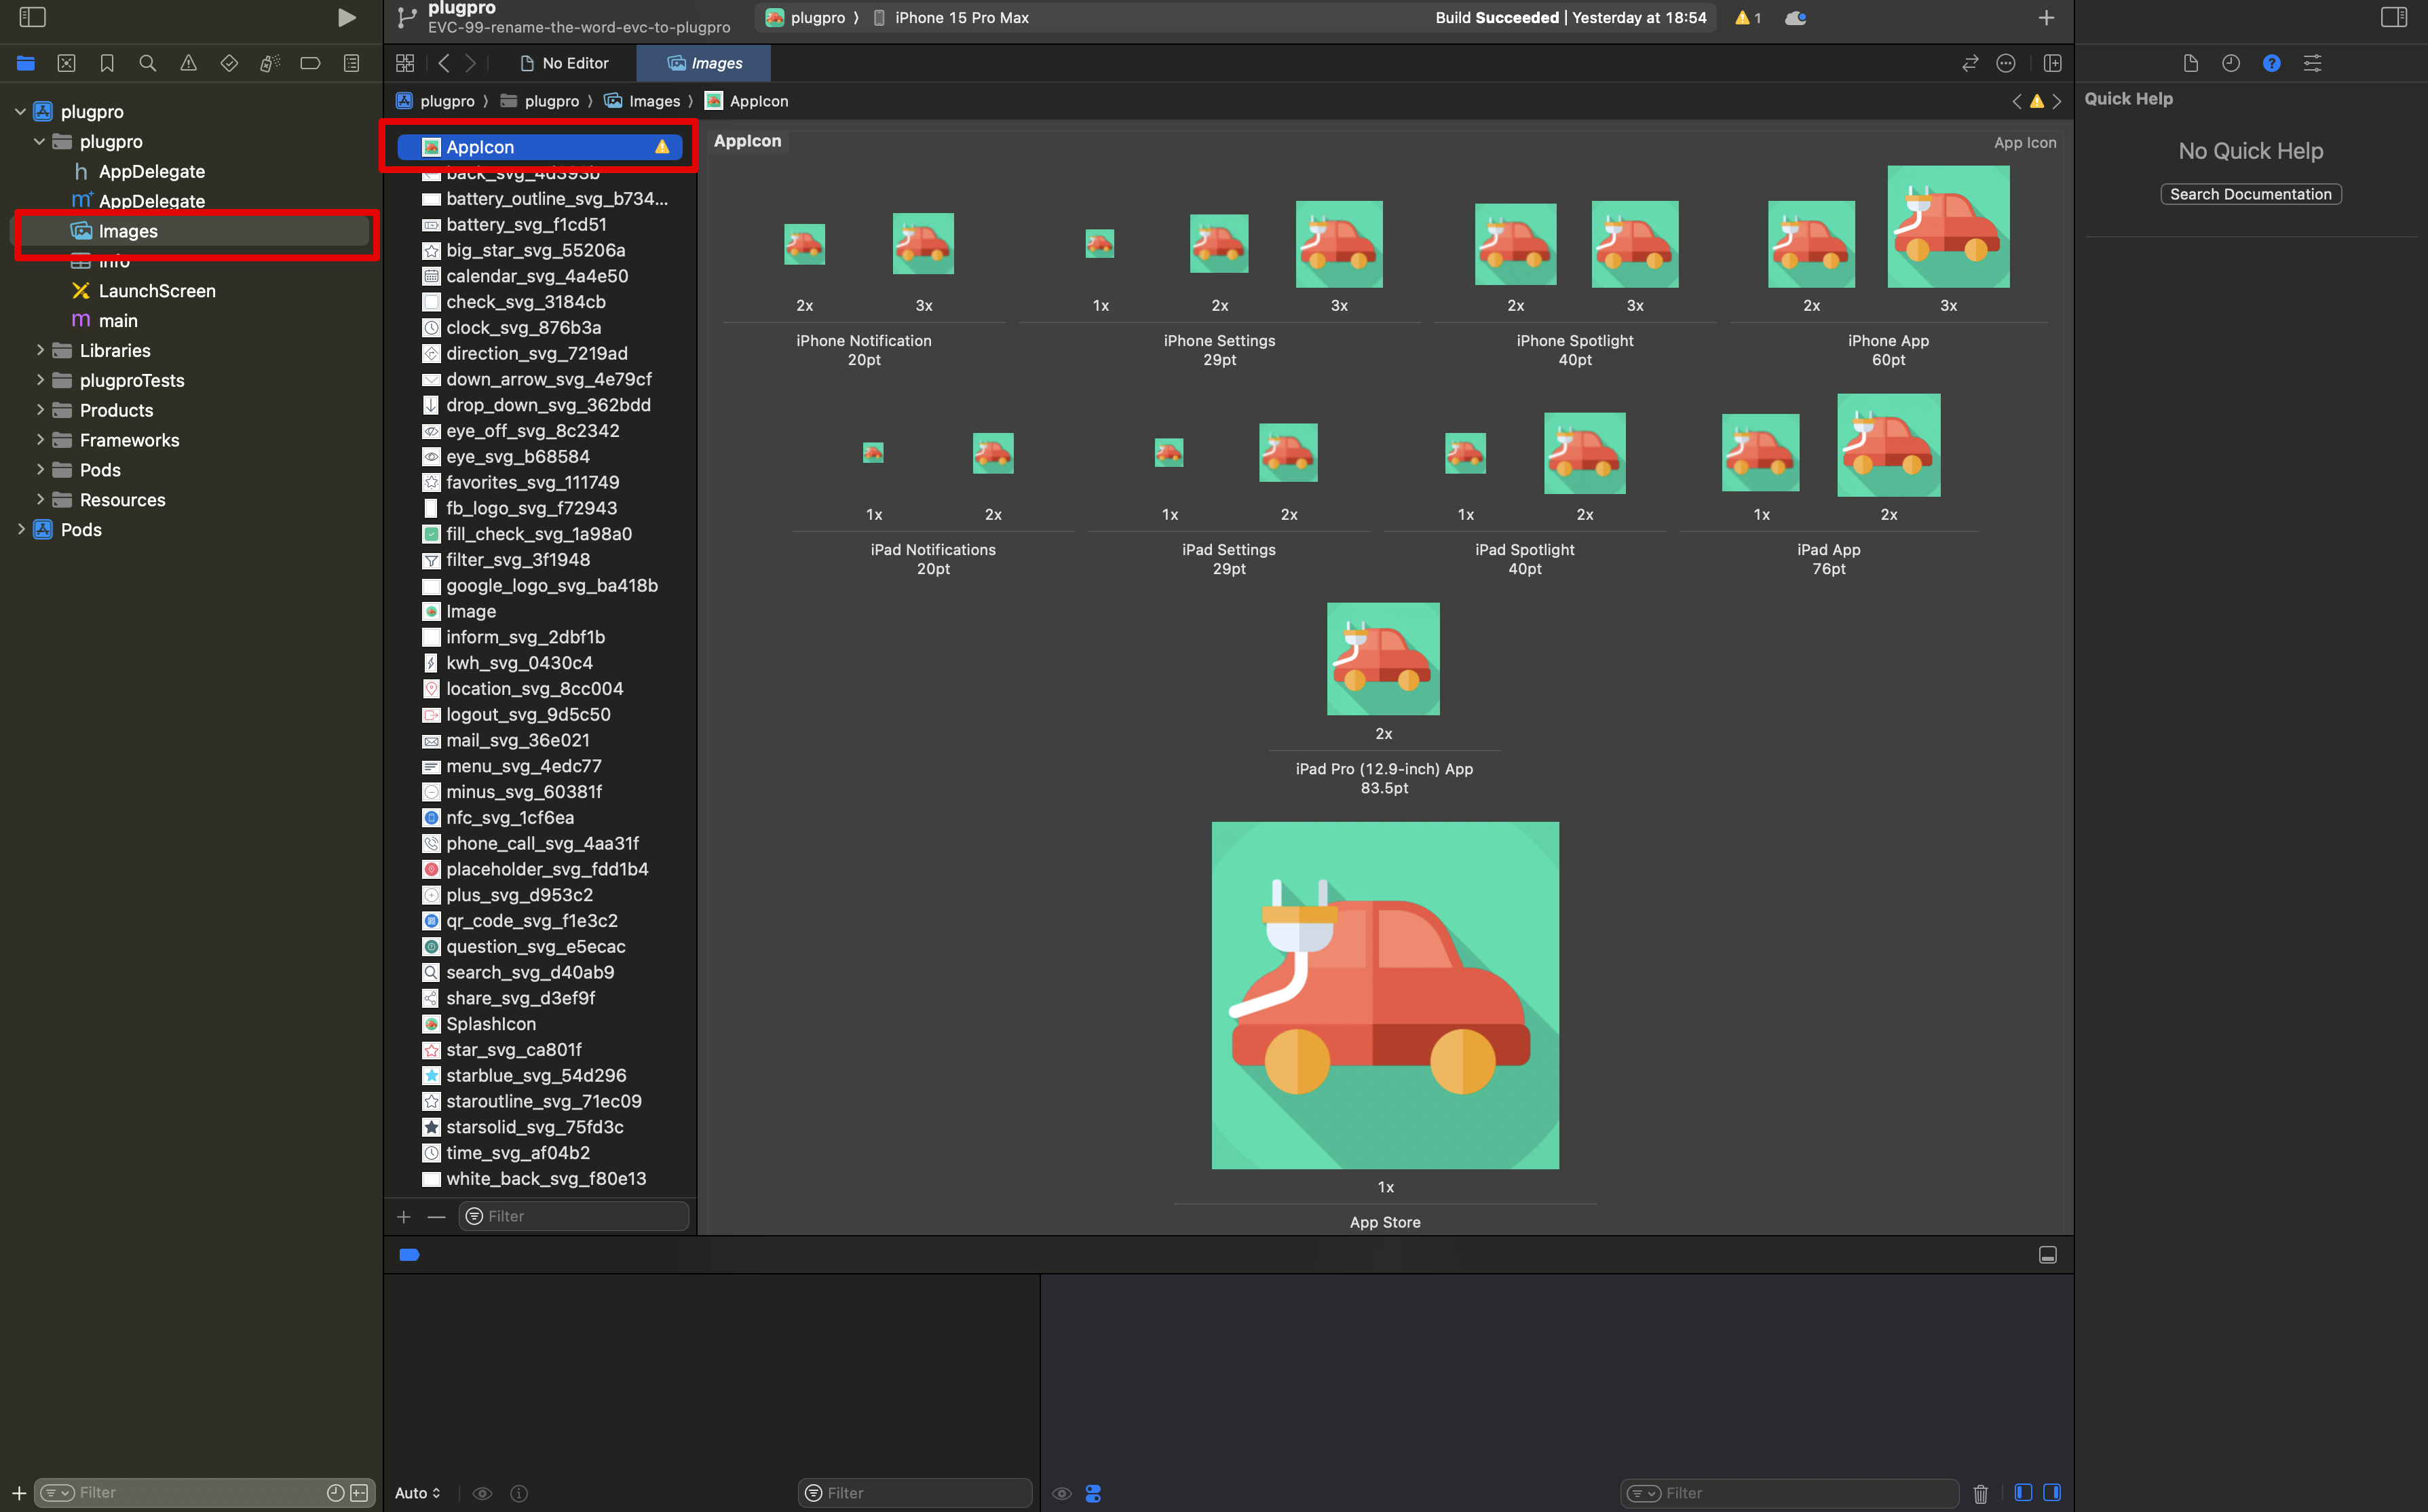
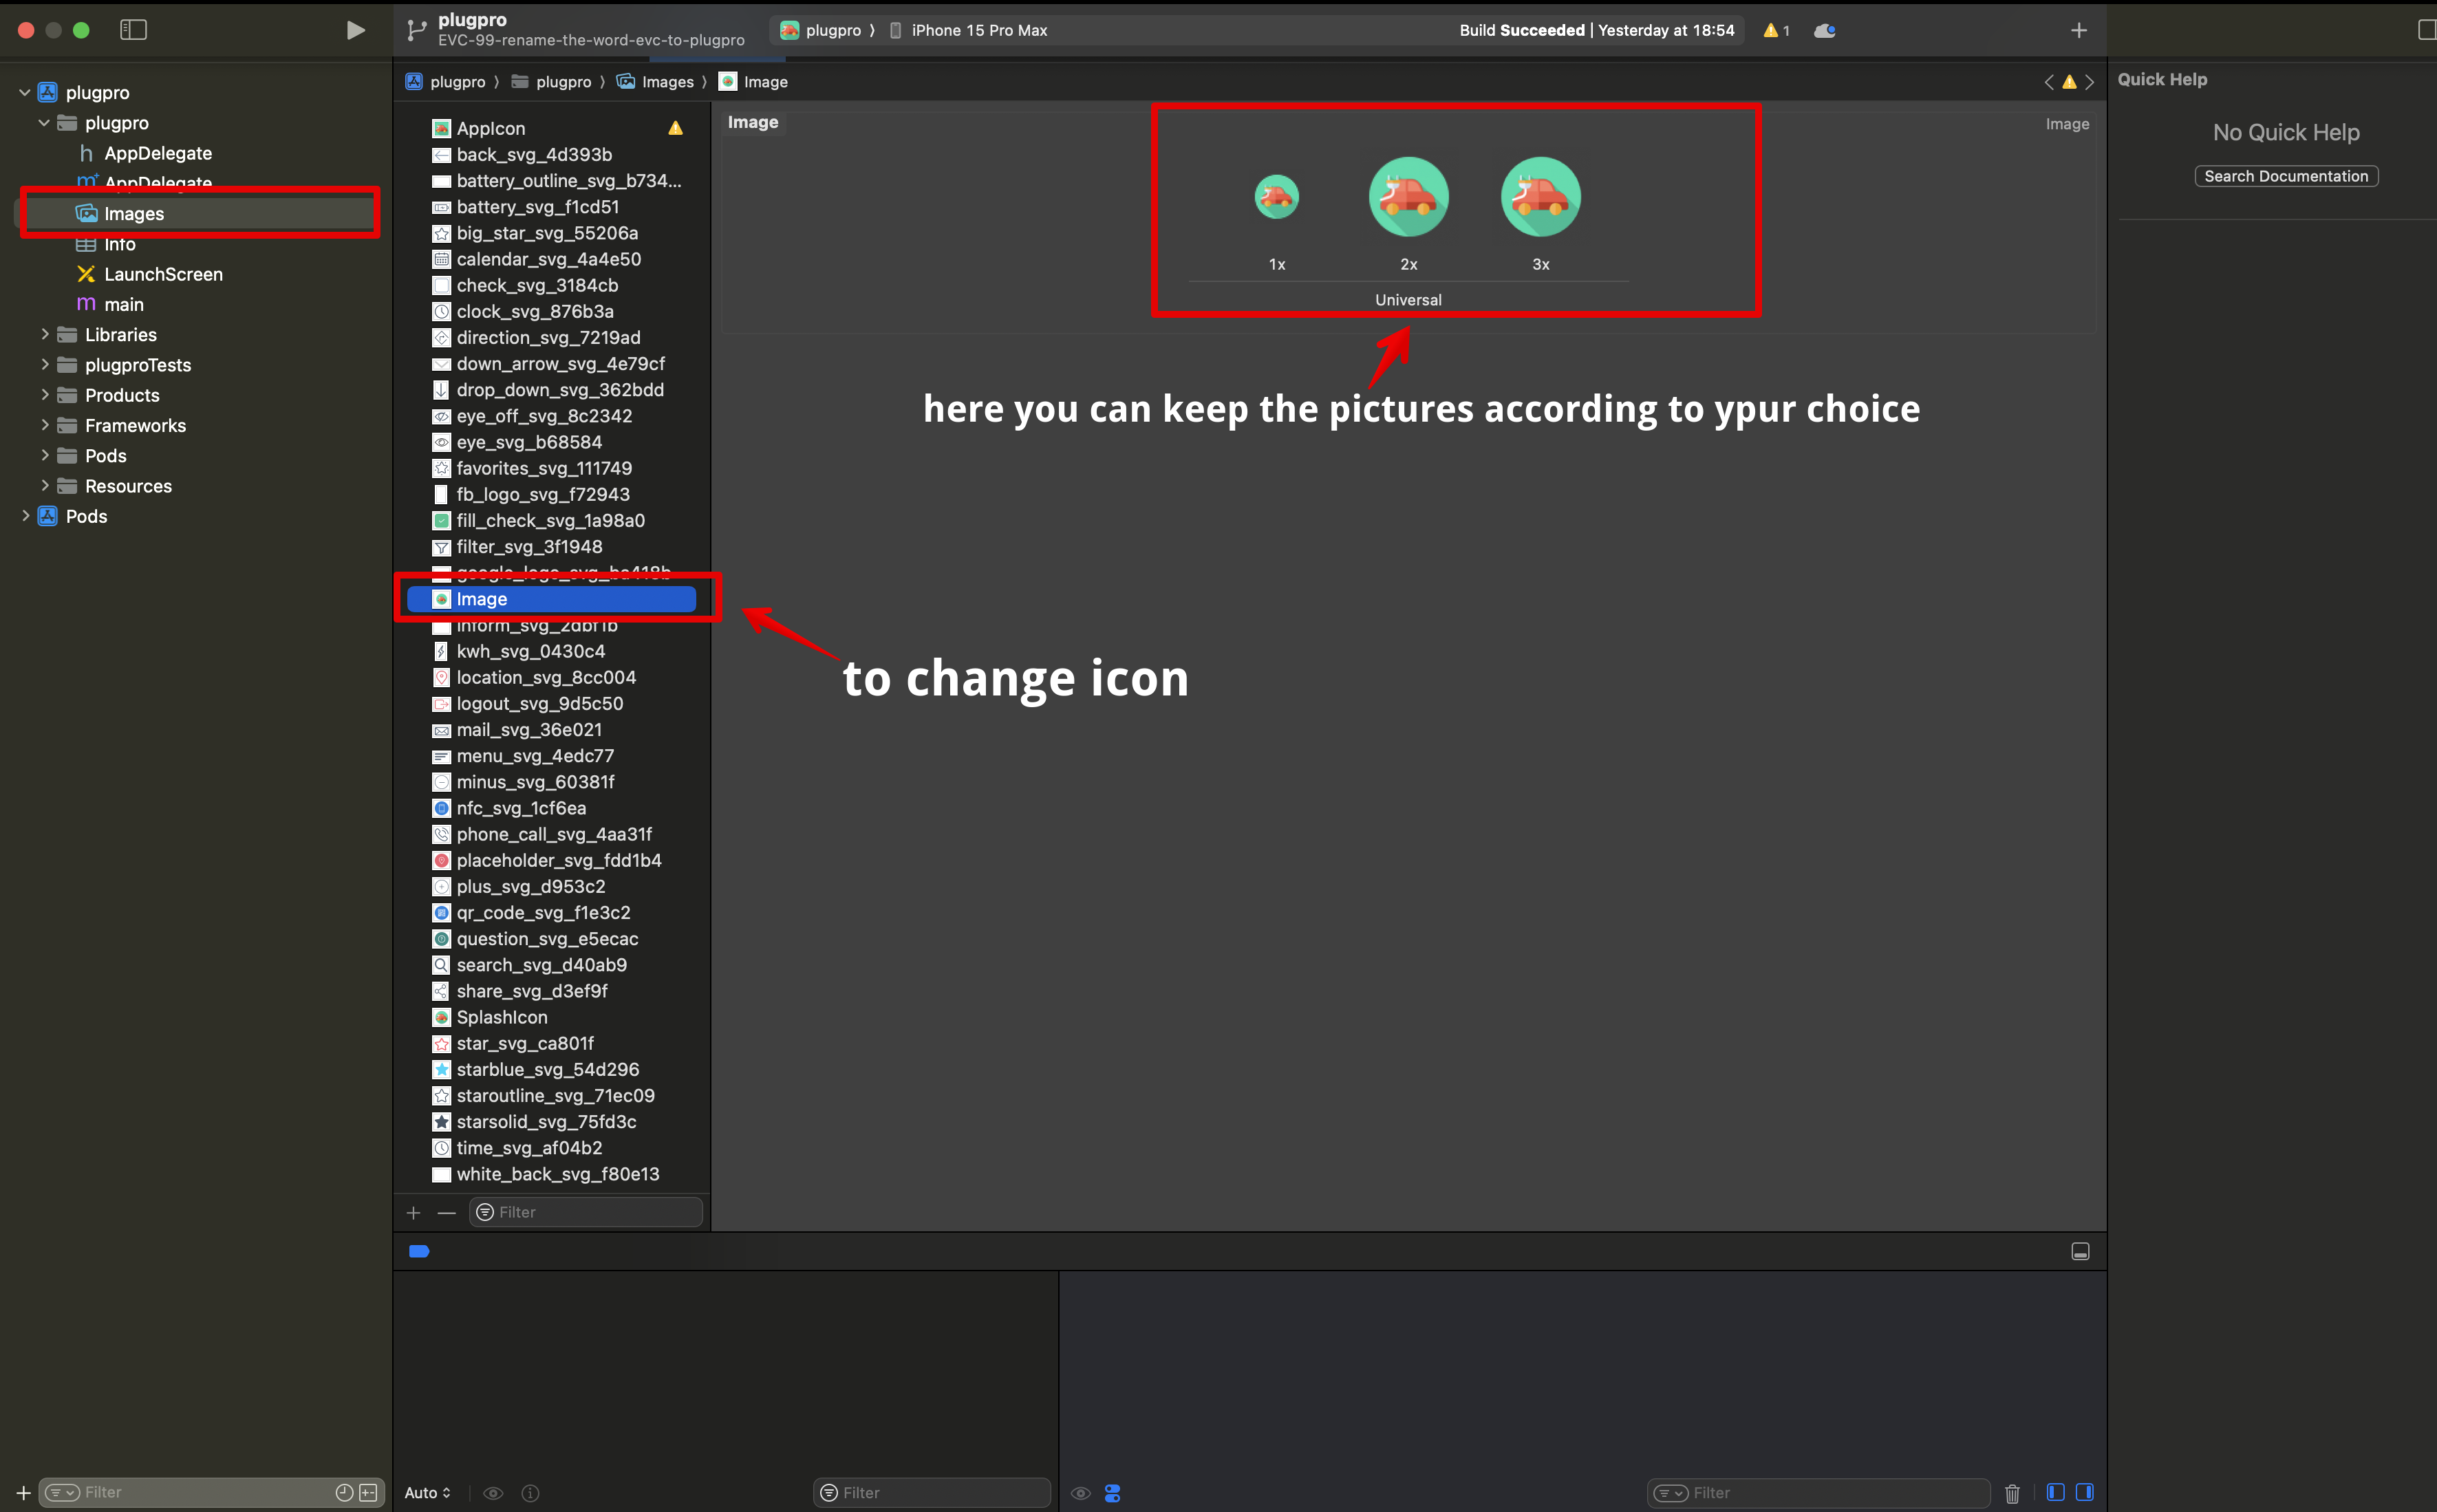
Change App Icon
Open '{project-folder}/ios/plugpro.xcworkspace' from the project folder in Xcode or go to terminal then run 'xed -b ios' then you can change
Click Images in the Project navigator and then choose AppIcon.
Now just drag the right sized image (in .png format) from Finder onto every blank in the app set. The app icon should be all set up now.
Referential https://stackoverflow.com/questions/28170520/ios-how-to-set-app-icon-and-launch-images
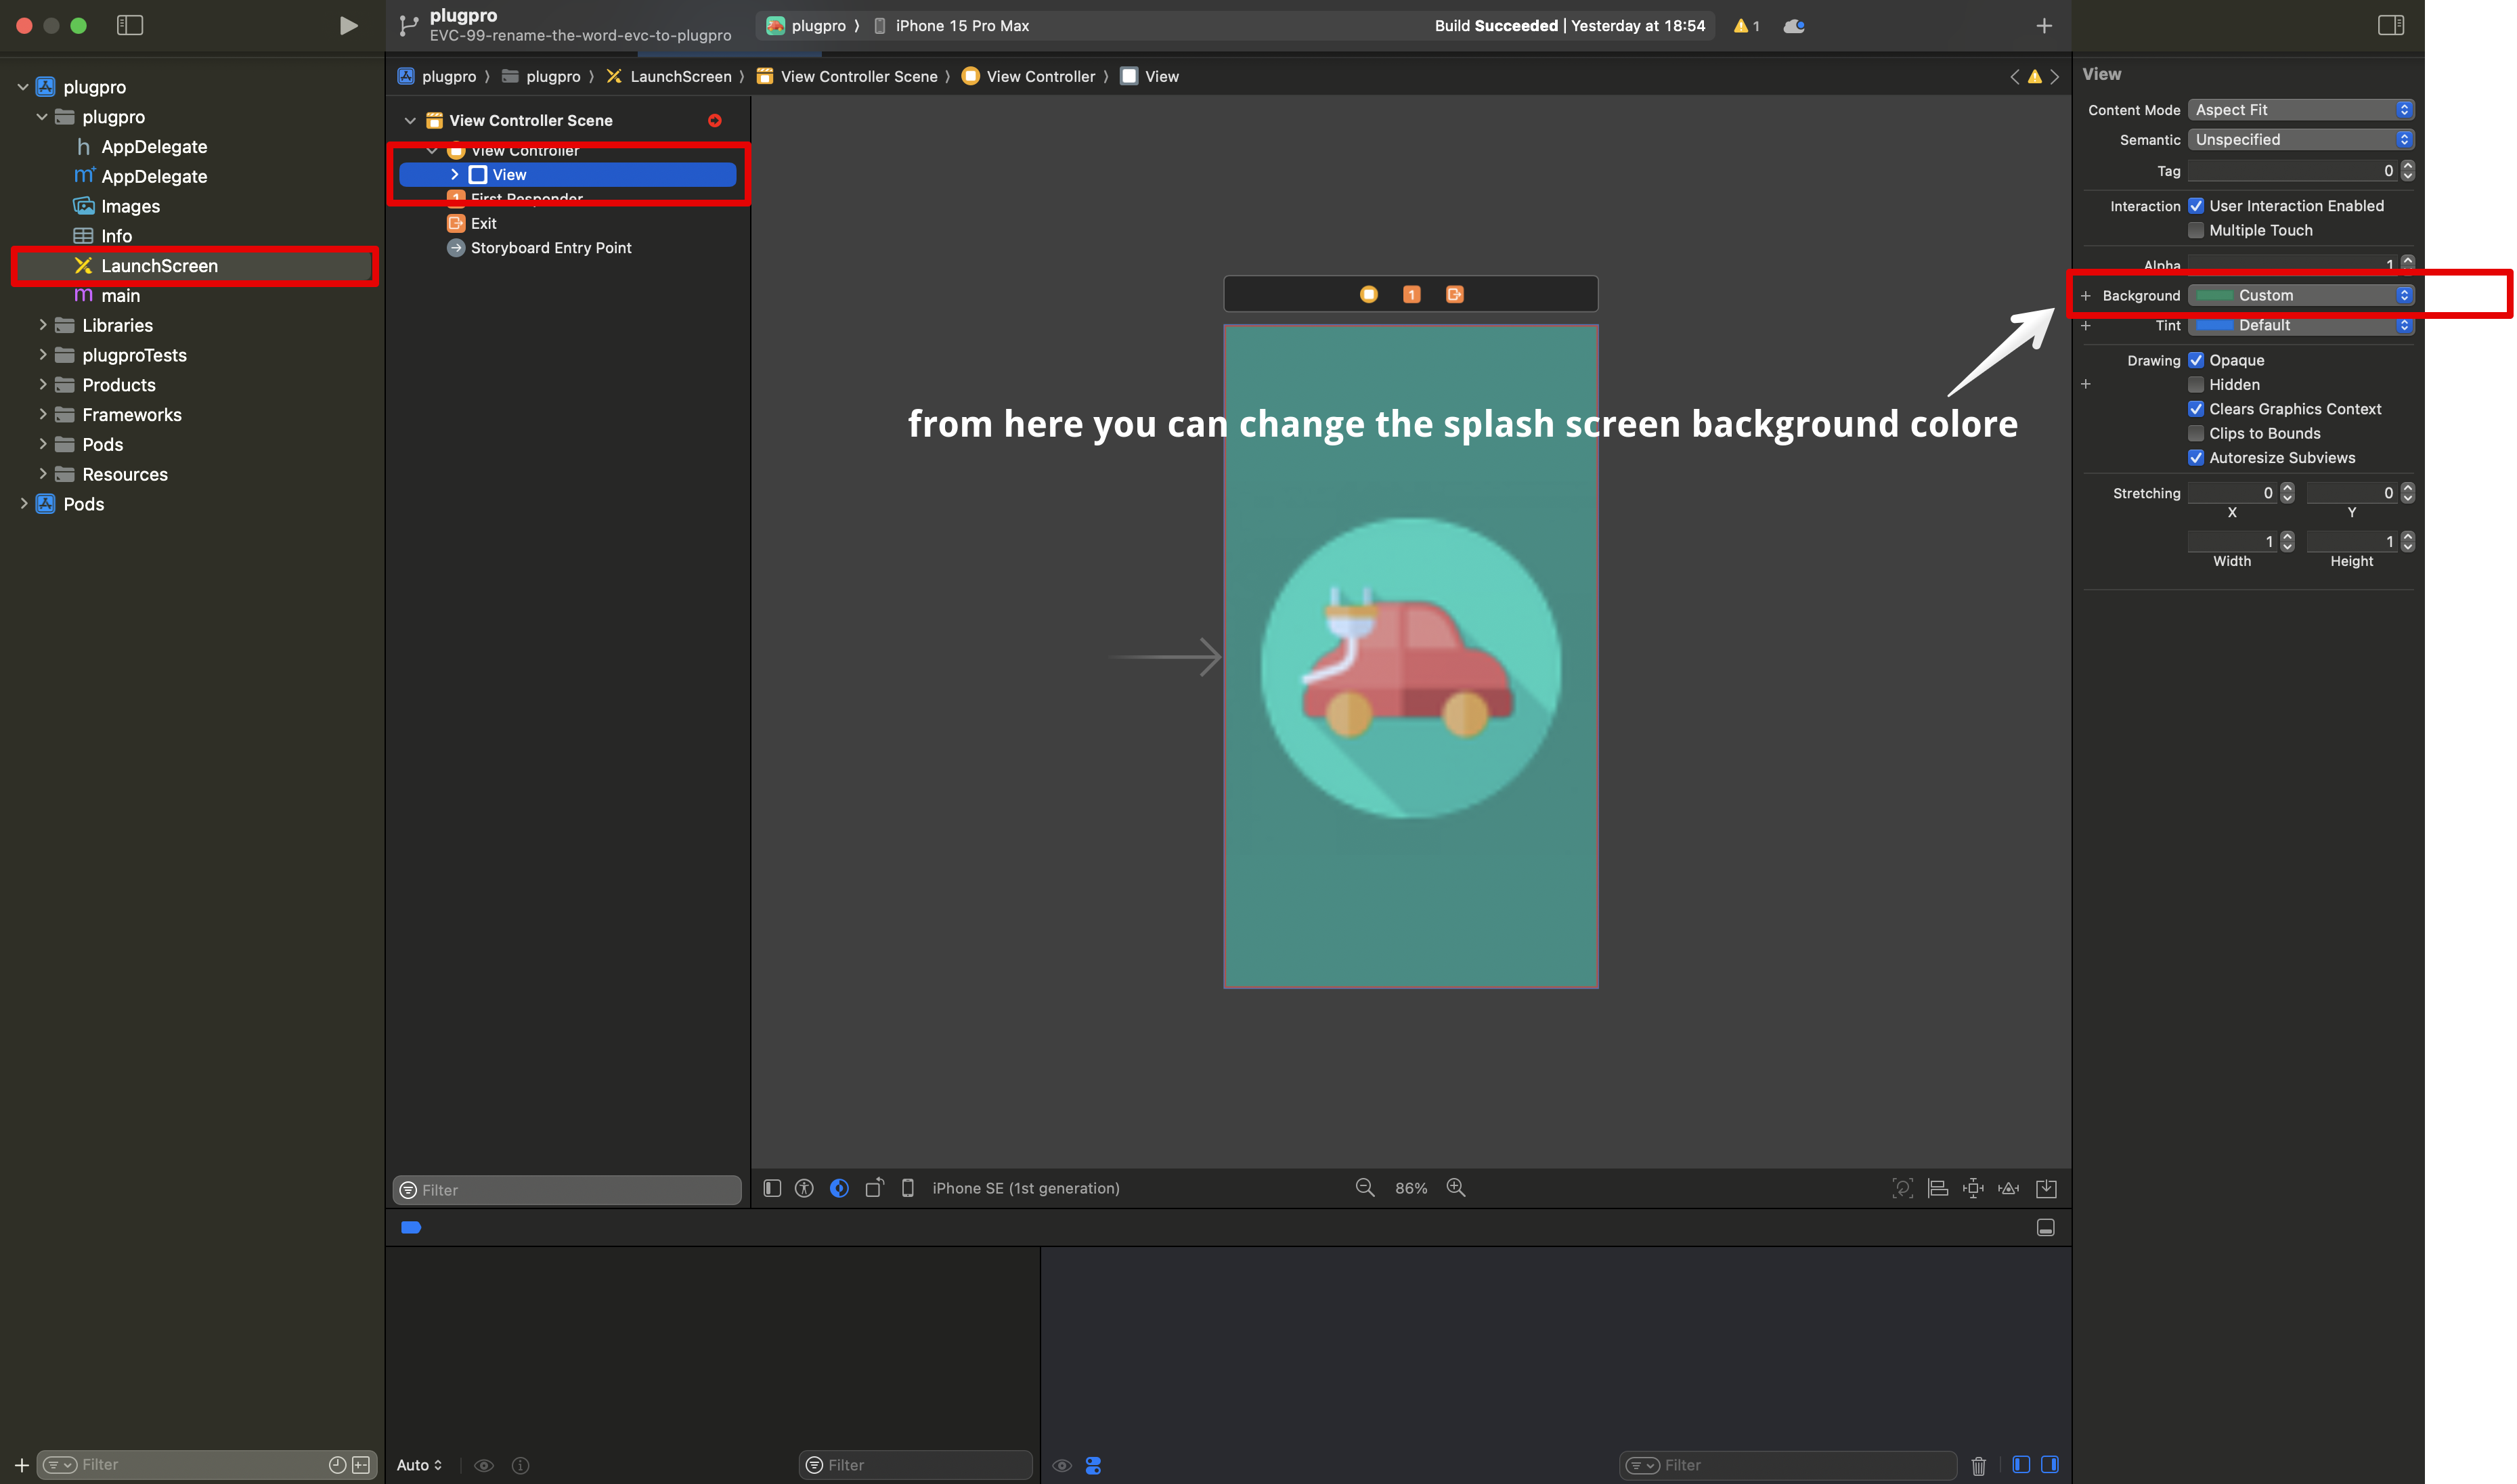
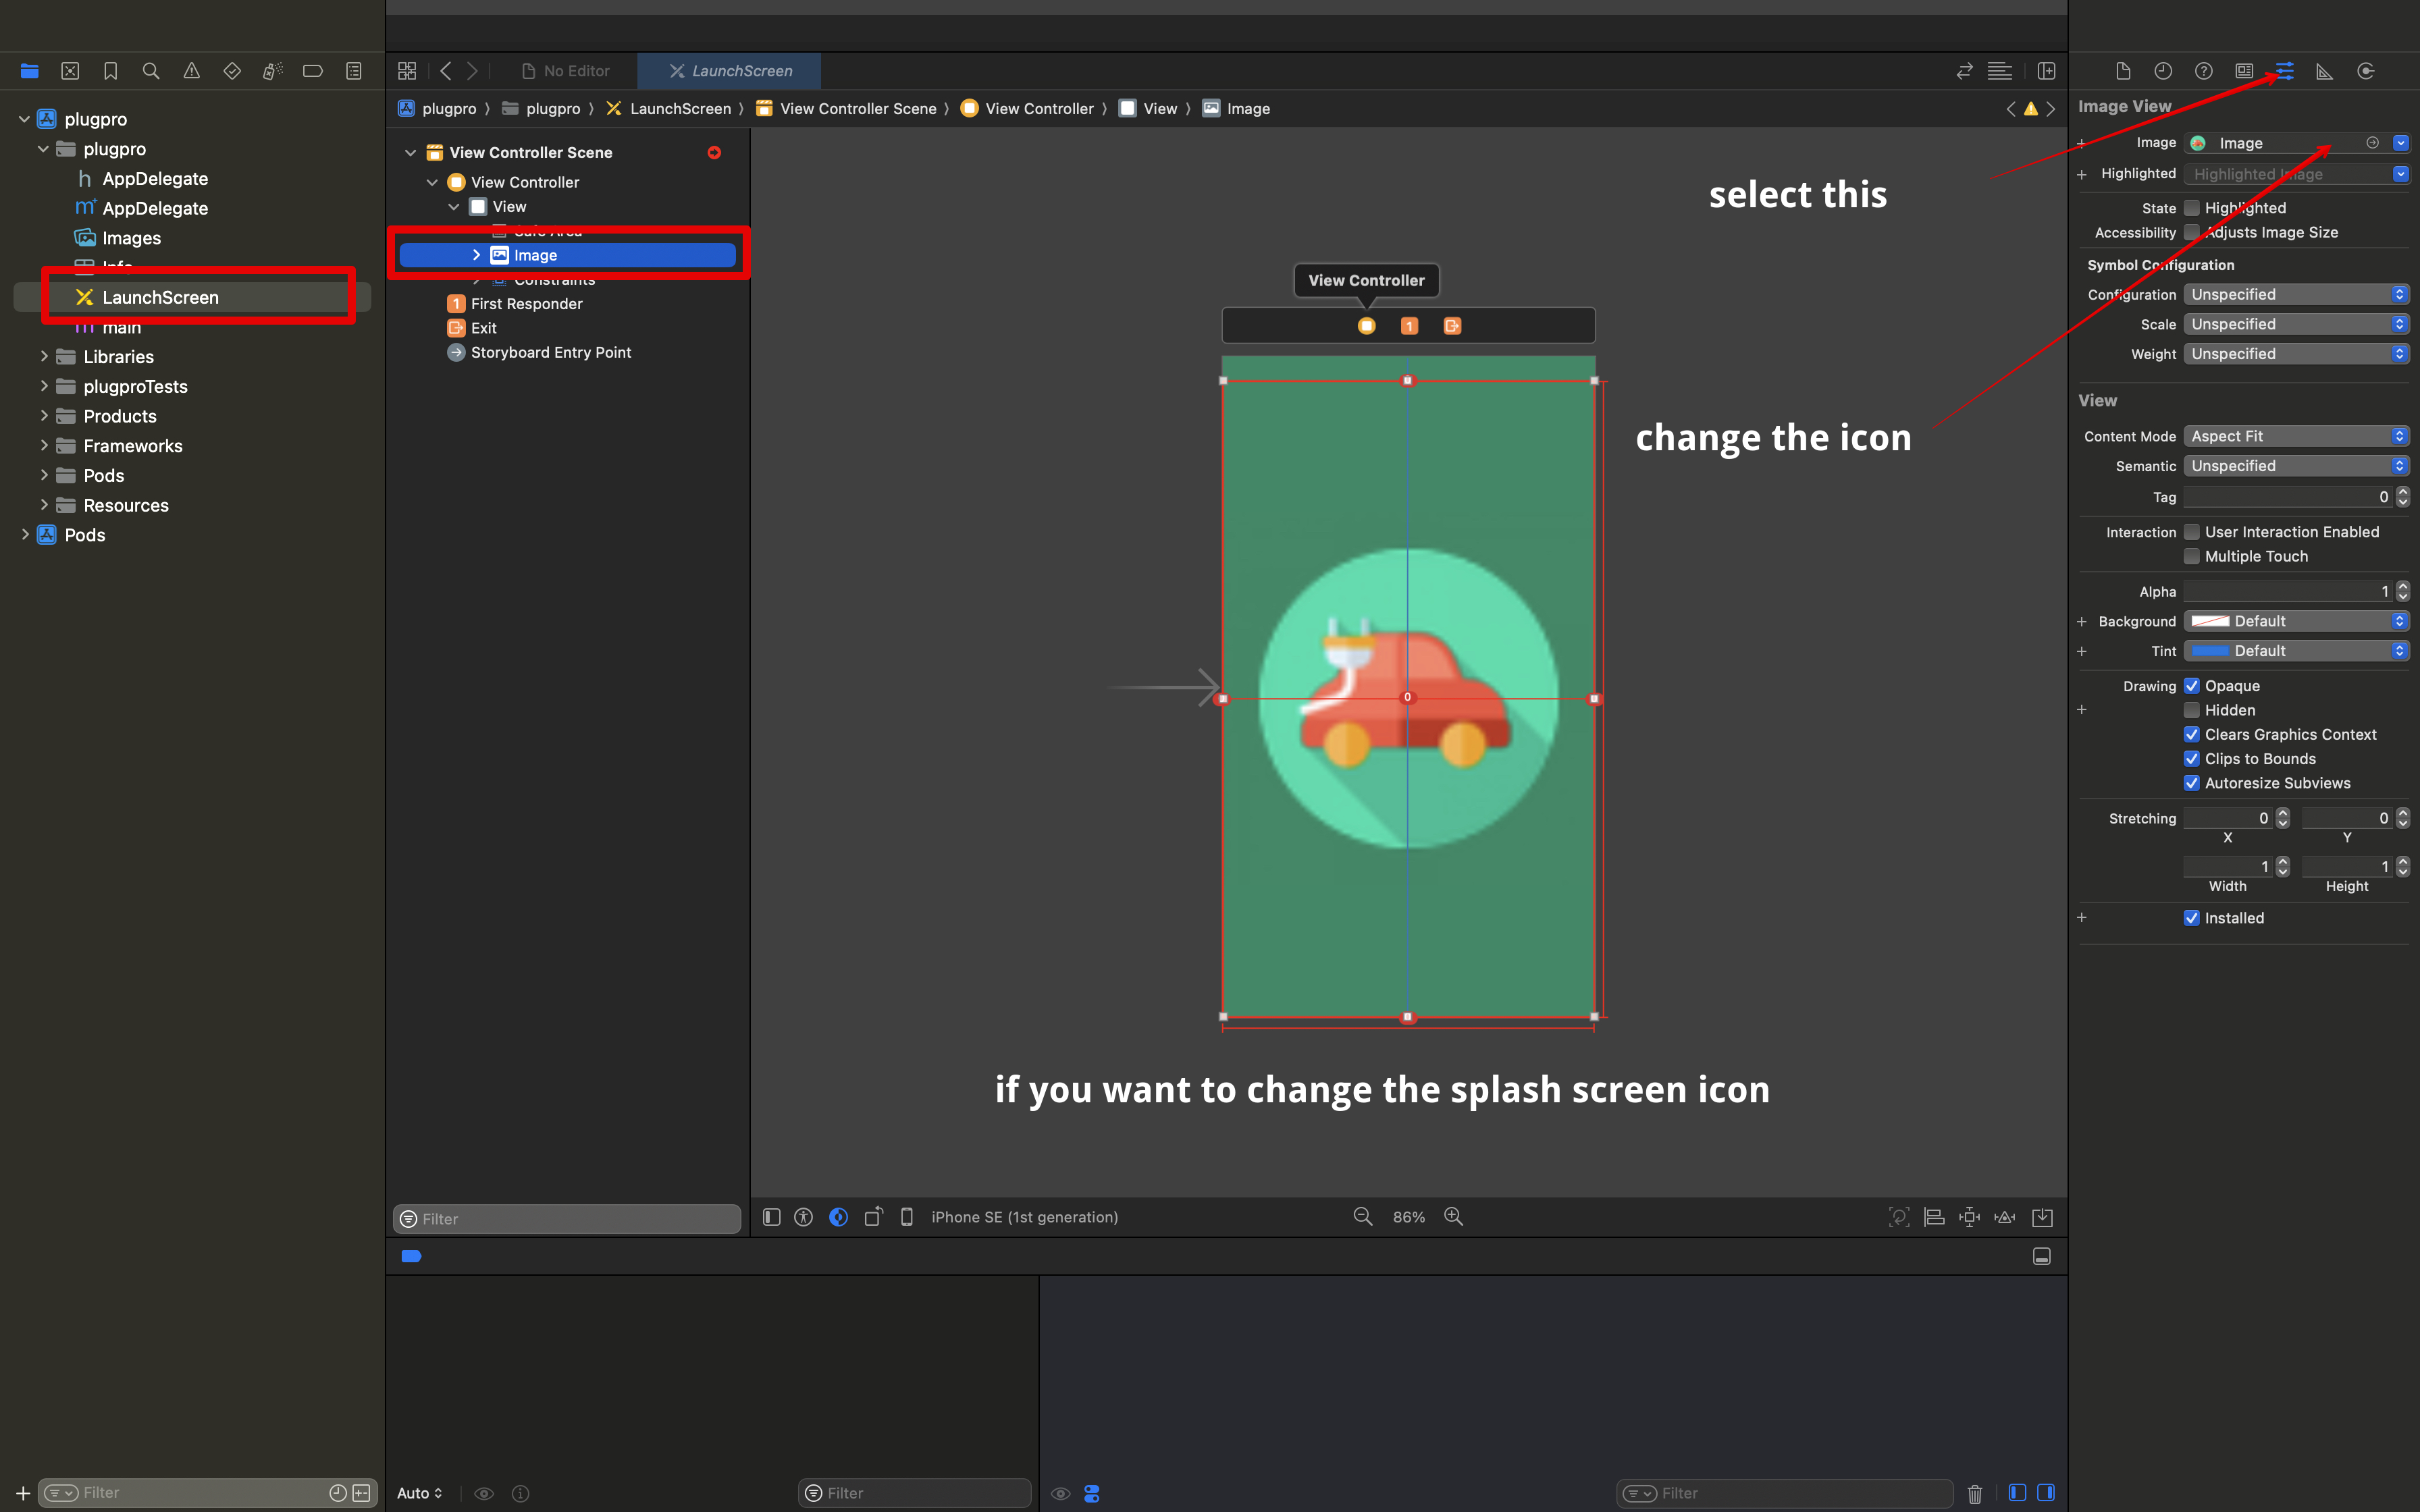
Change Splash Screen
Open '{project-folder}/ios/plugpro.xcworkspace' from the project folder in Xcode or go to terminal then run 'xed -b ios' then you can change
-
By this step you can chose image by (.png format) as your desired
-
By this you can set a default background color
-
By this you can set a default splash screen icon
Android Setup
Run the app using Android Studio
The quickest way to run the Android version of carPooling app is to run an emulator first and to run an emulator, open your 'Android Studio' and run the emulator manually. Follow the below steps to run a pre-installed emulator in Android Studio:
- In the toolbar, select the AVD that you want to run your app on from the target device drop-down menu.
- Click Run
Run the app using terminal
Open terminal > go the the project-folder > run
yarn android
If you get error like
Run this command to fix the permission inside your project-folder via command line or terminal run
chmod +x ./android/gradlew
then build the app again
Configuring Android
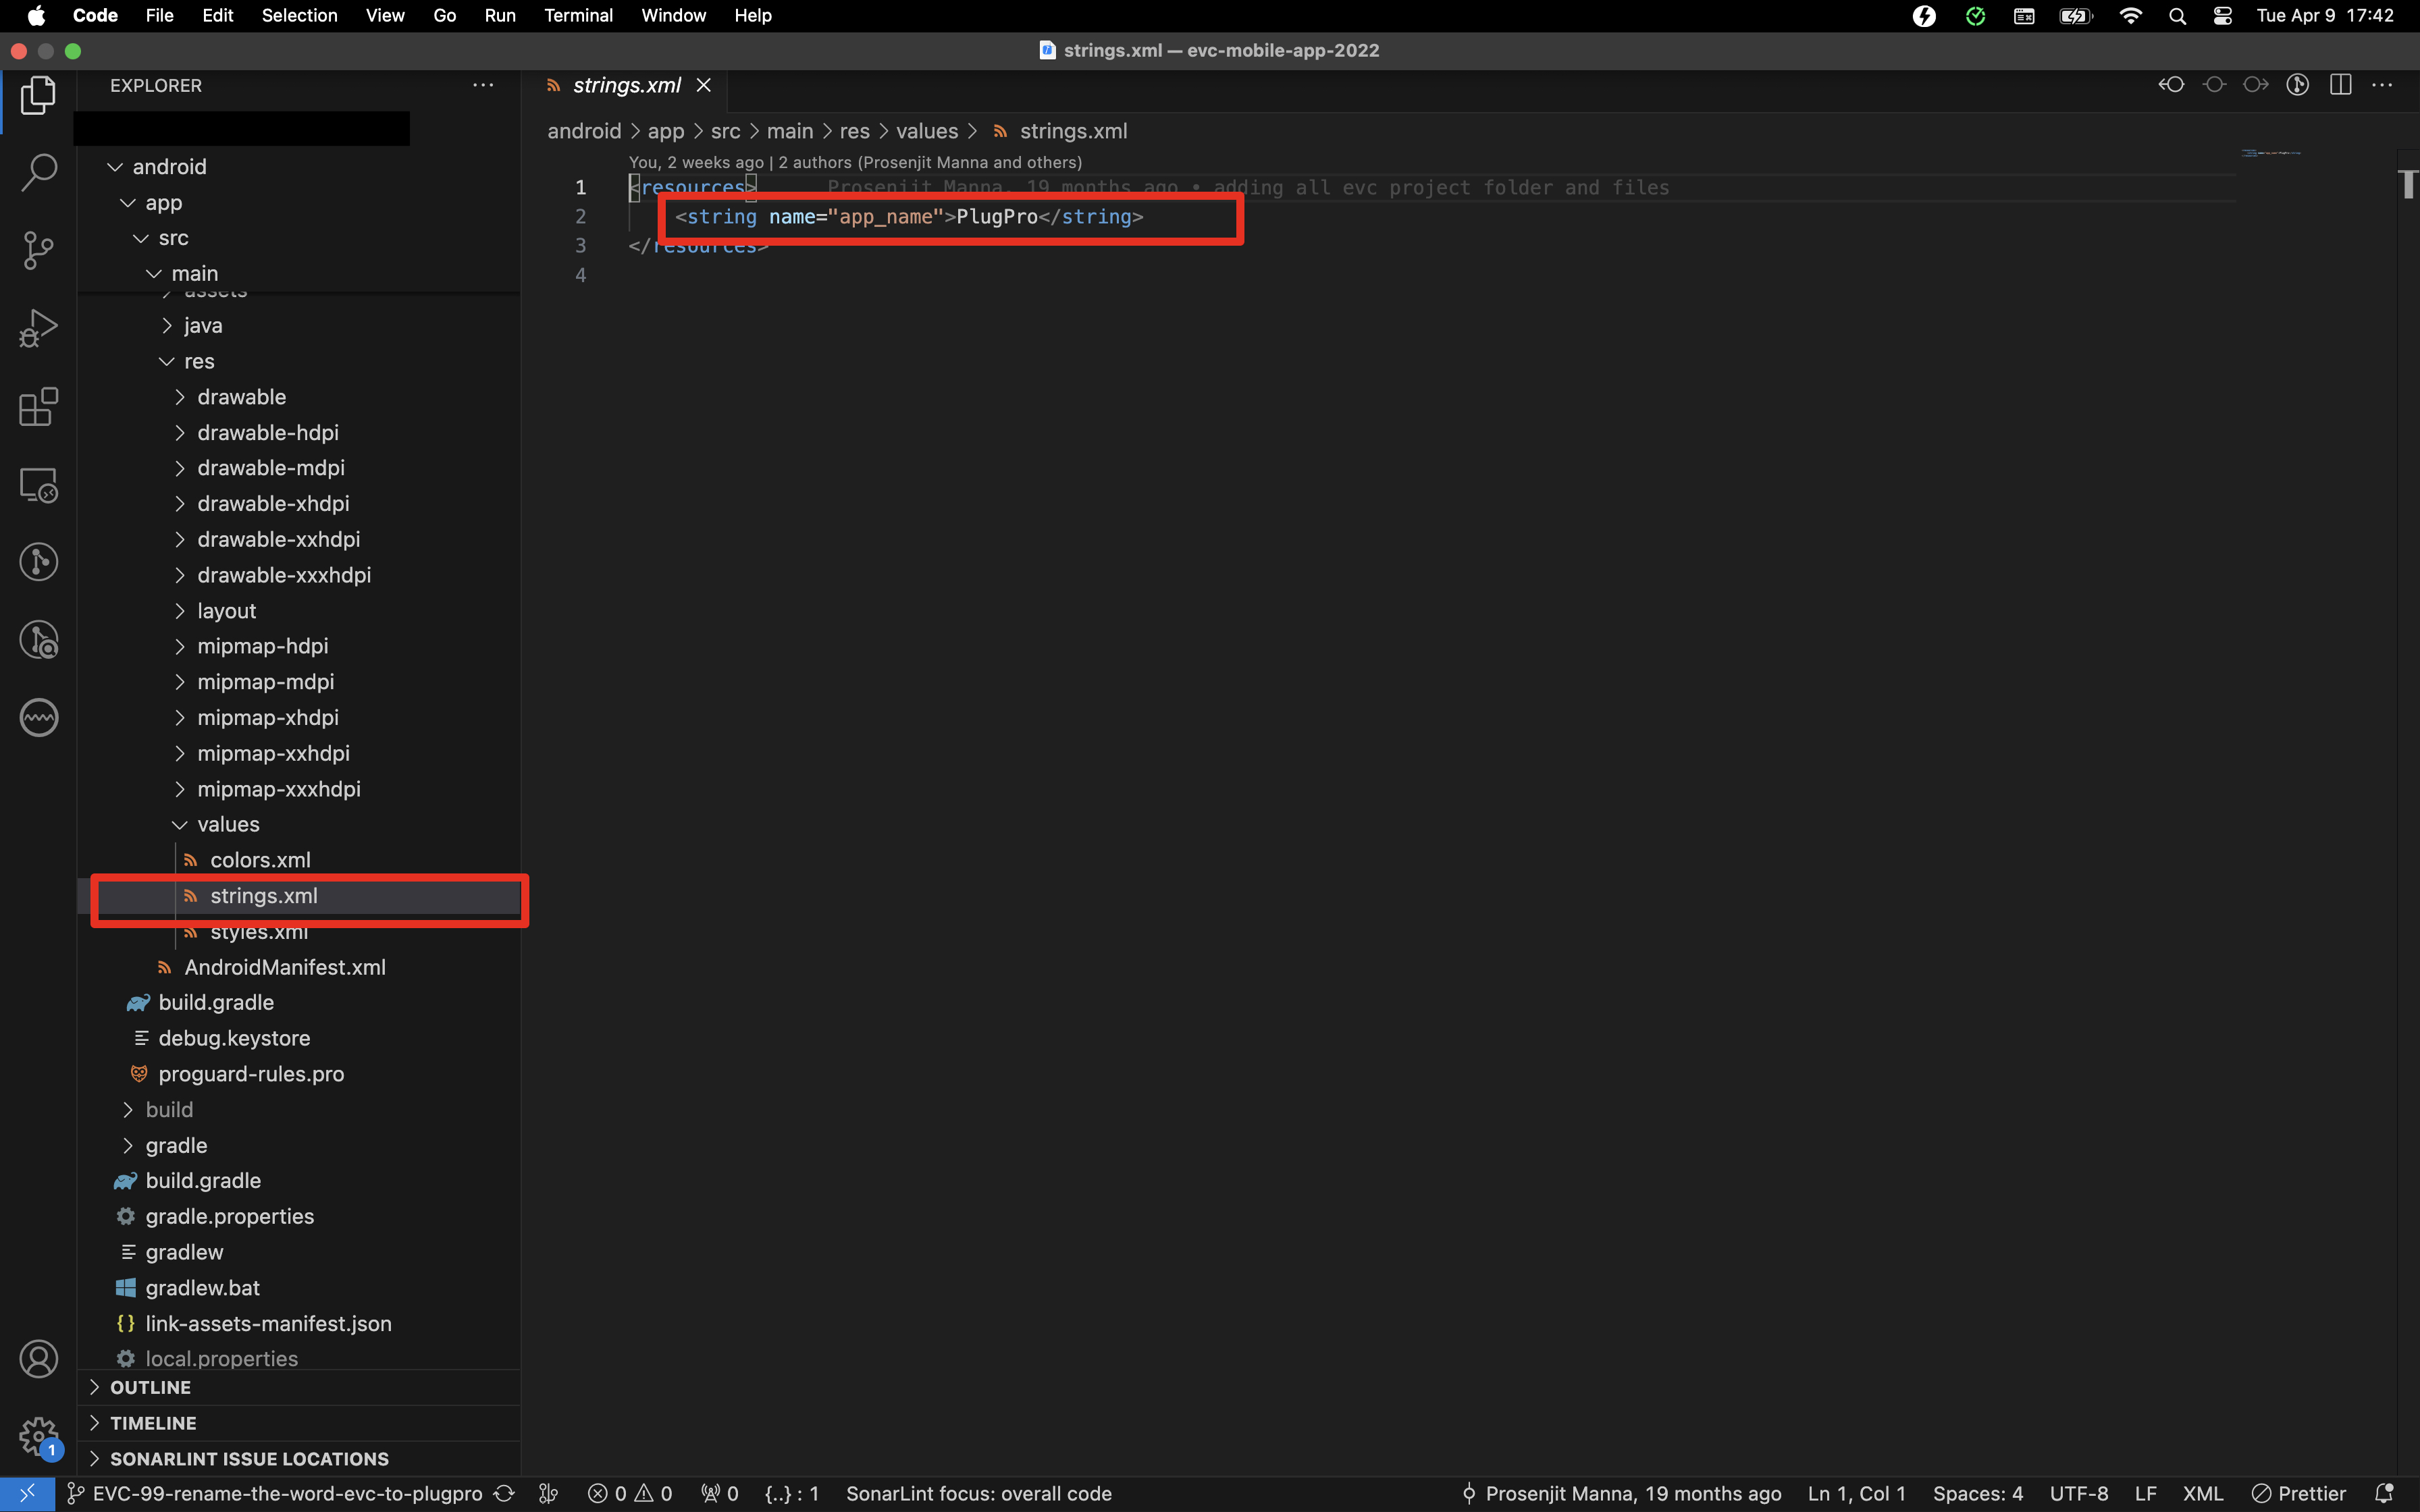
Change App Name
Open file 'android/app/src/main/res/values/strings.xml' and change it to your App name.
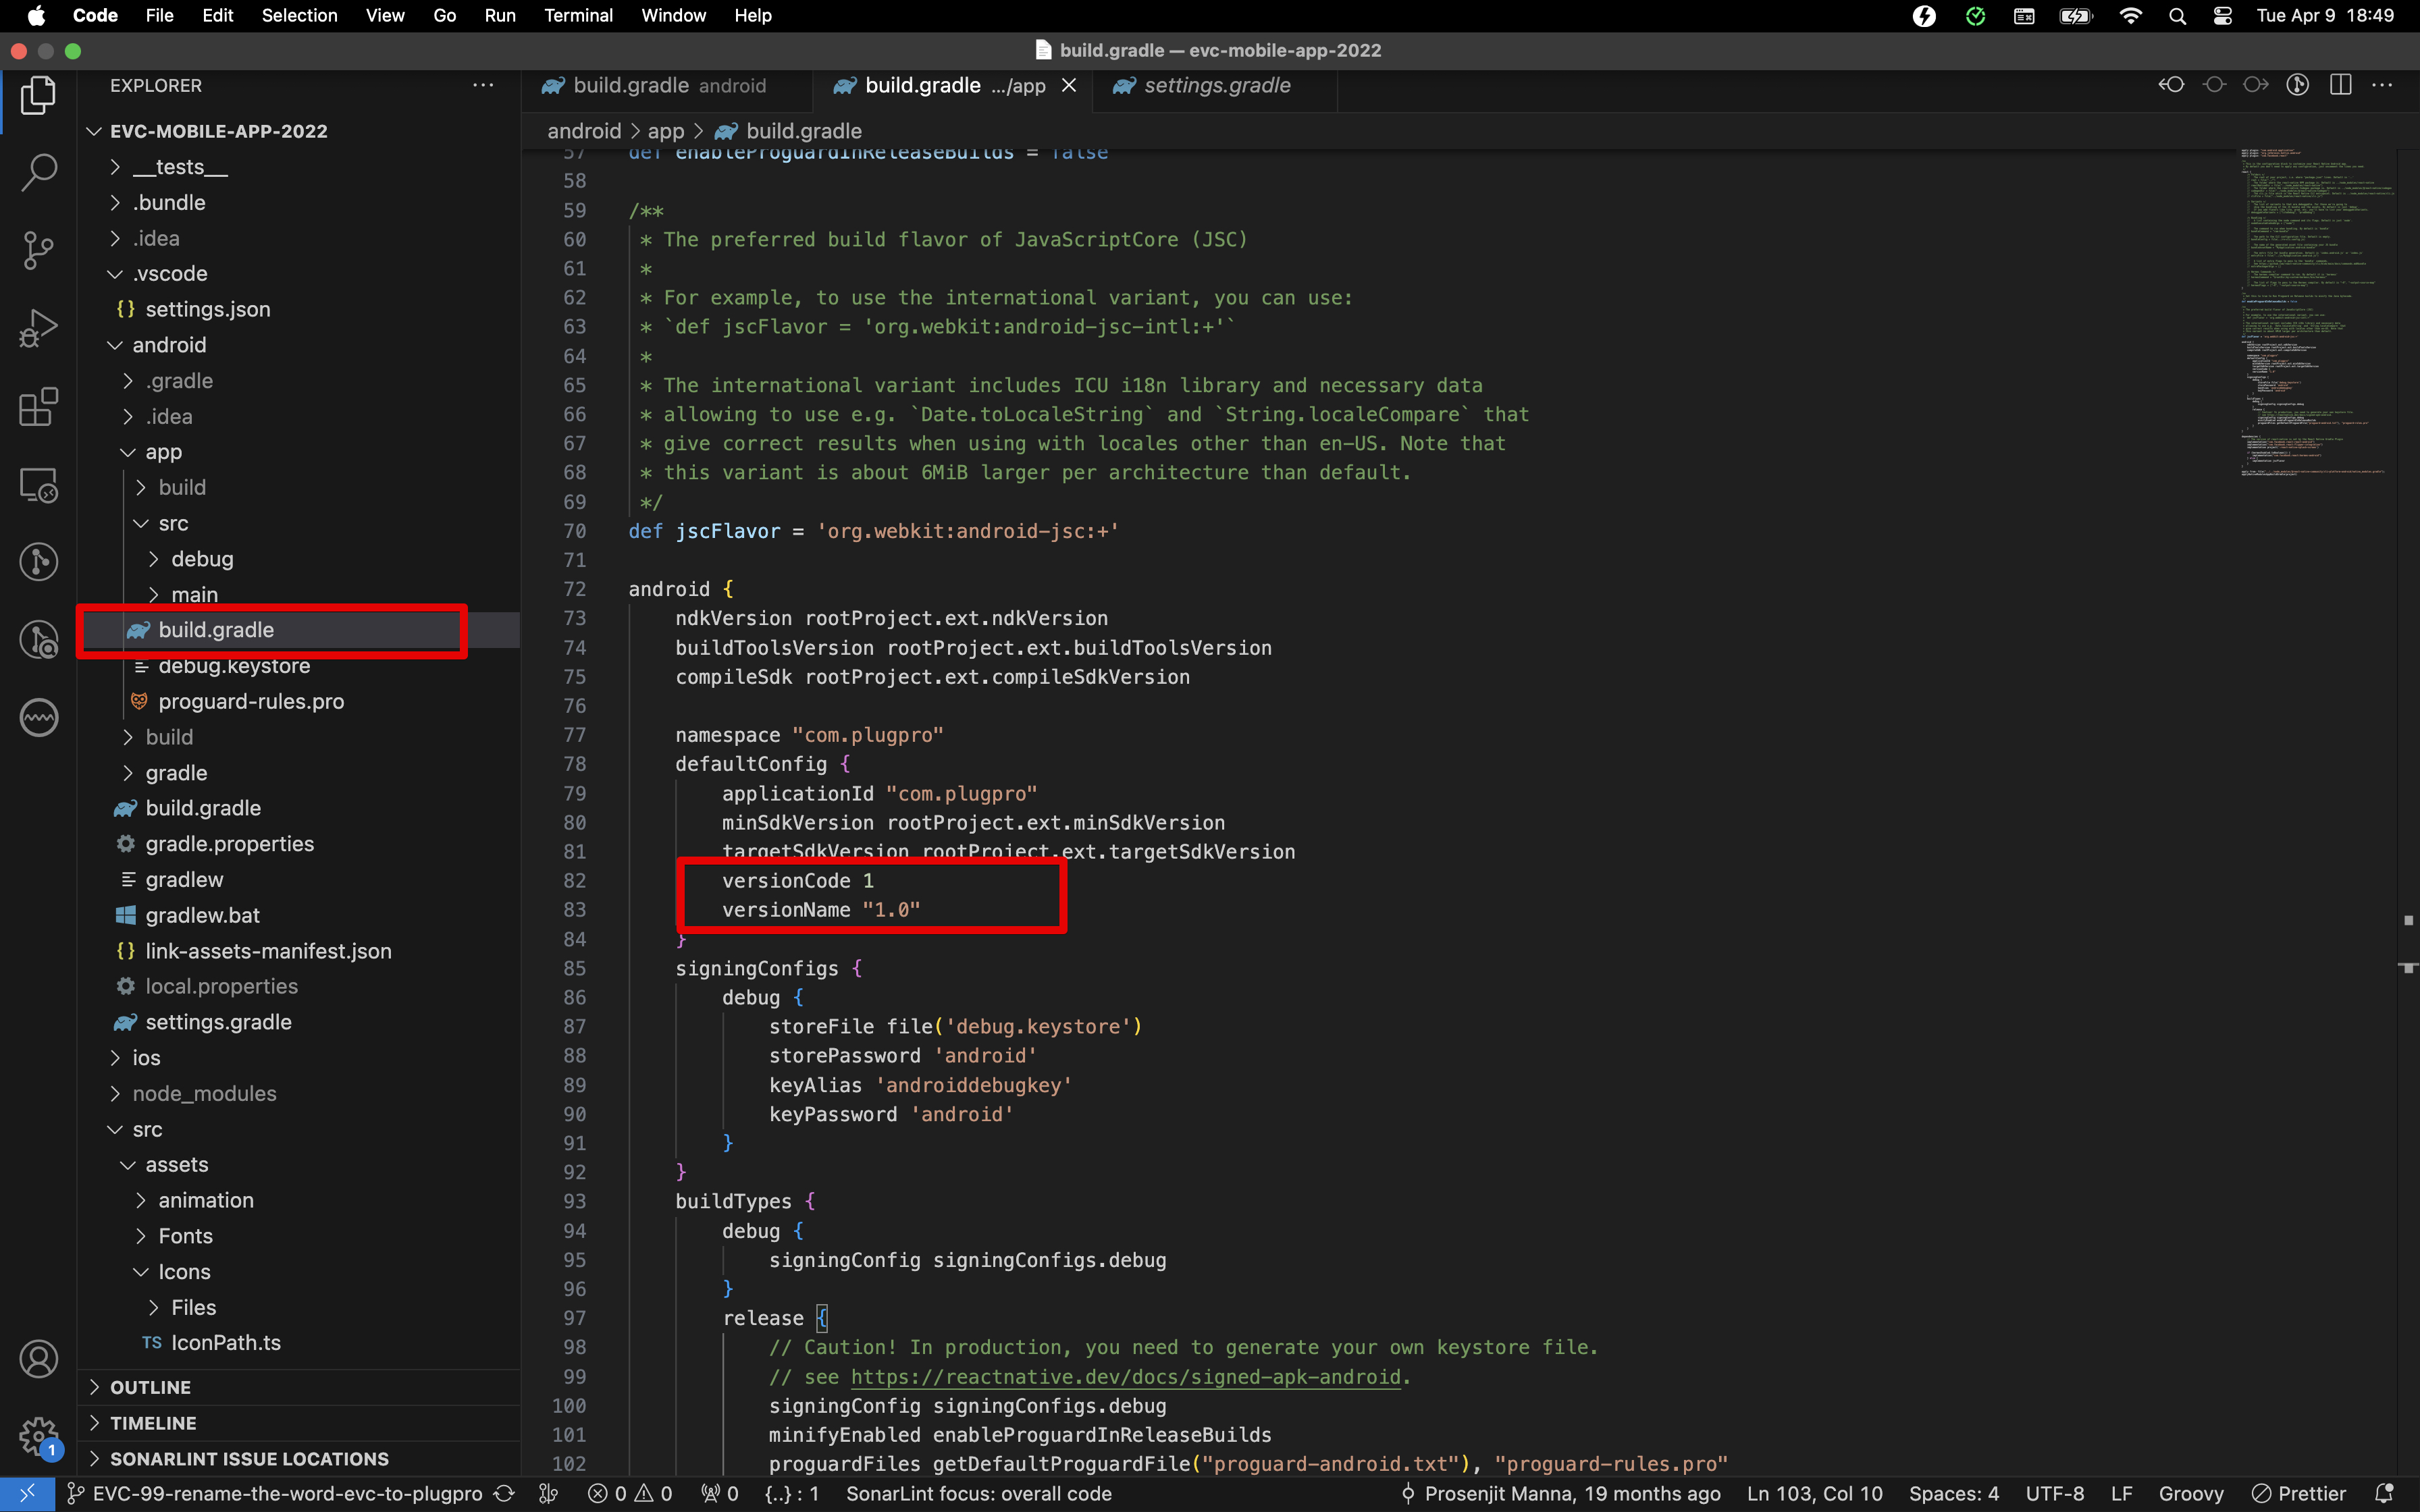
How to configure the build version and application ID of your app?
Open file '{project-folder}/android/app/build.gradle' and change it to your own build version and application ID.
Get more information about Application Id: https://developer.android.com/studio/build/application-id
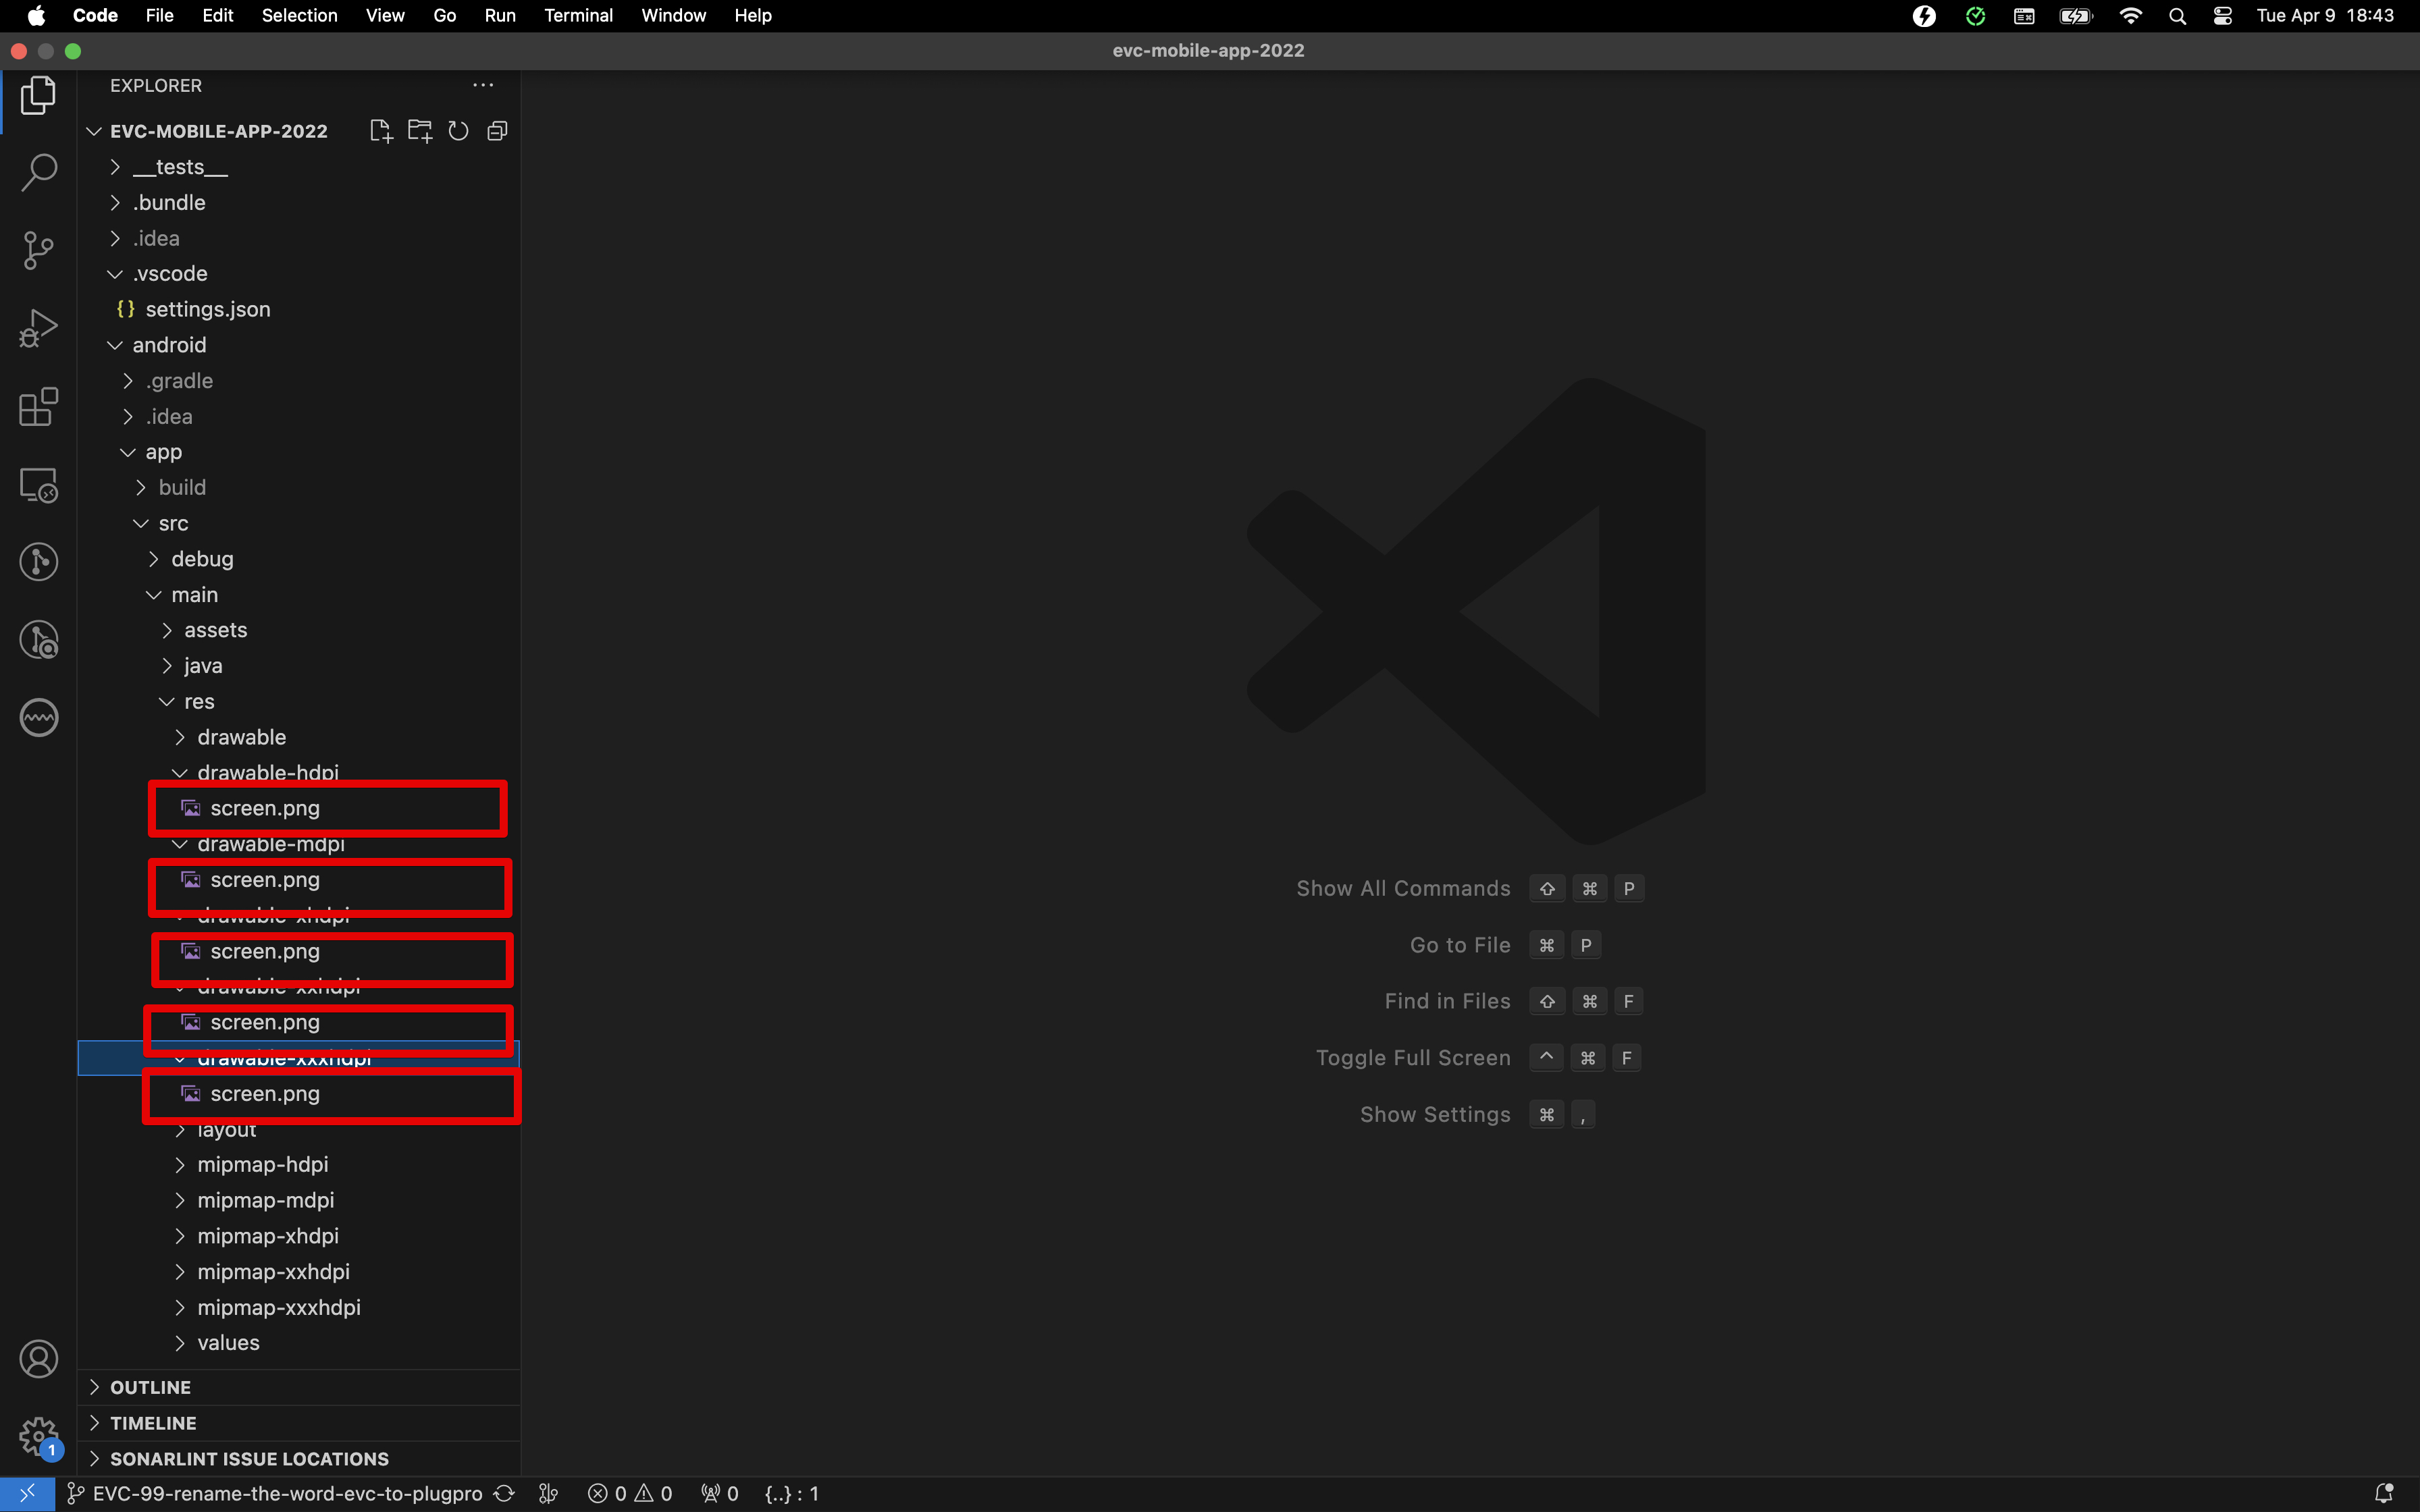
Change Splash Screen
If you want to change the splash screen then go to '{project-folder}android/app/src/main/res/mipmap-*'' And replace the splash image with as your desired
Don't forget to clean the cache after change app info via the command line or terminal in macOS.
Open terminal > run
cd ./android && ./gradlew clean
Branding both android and ios
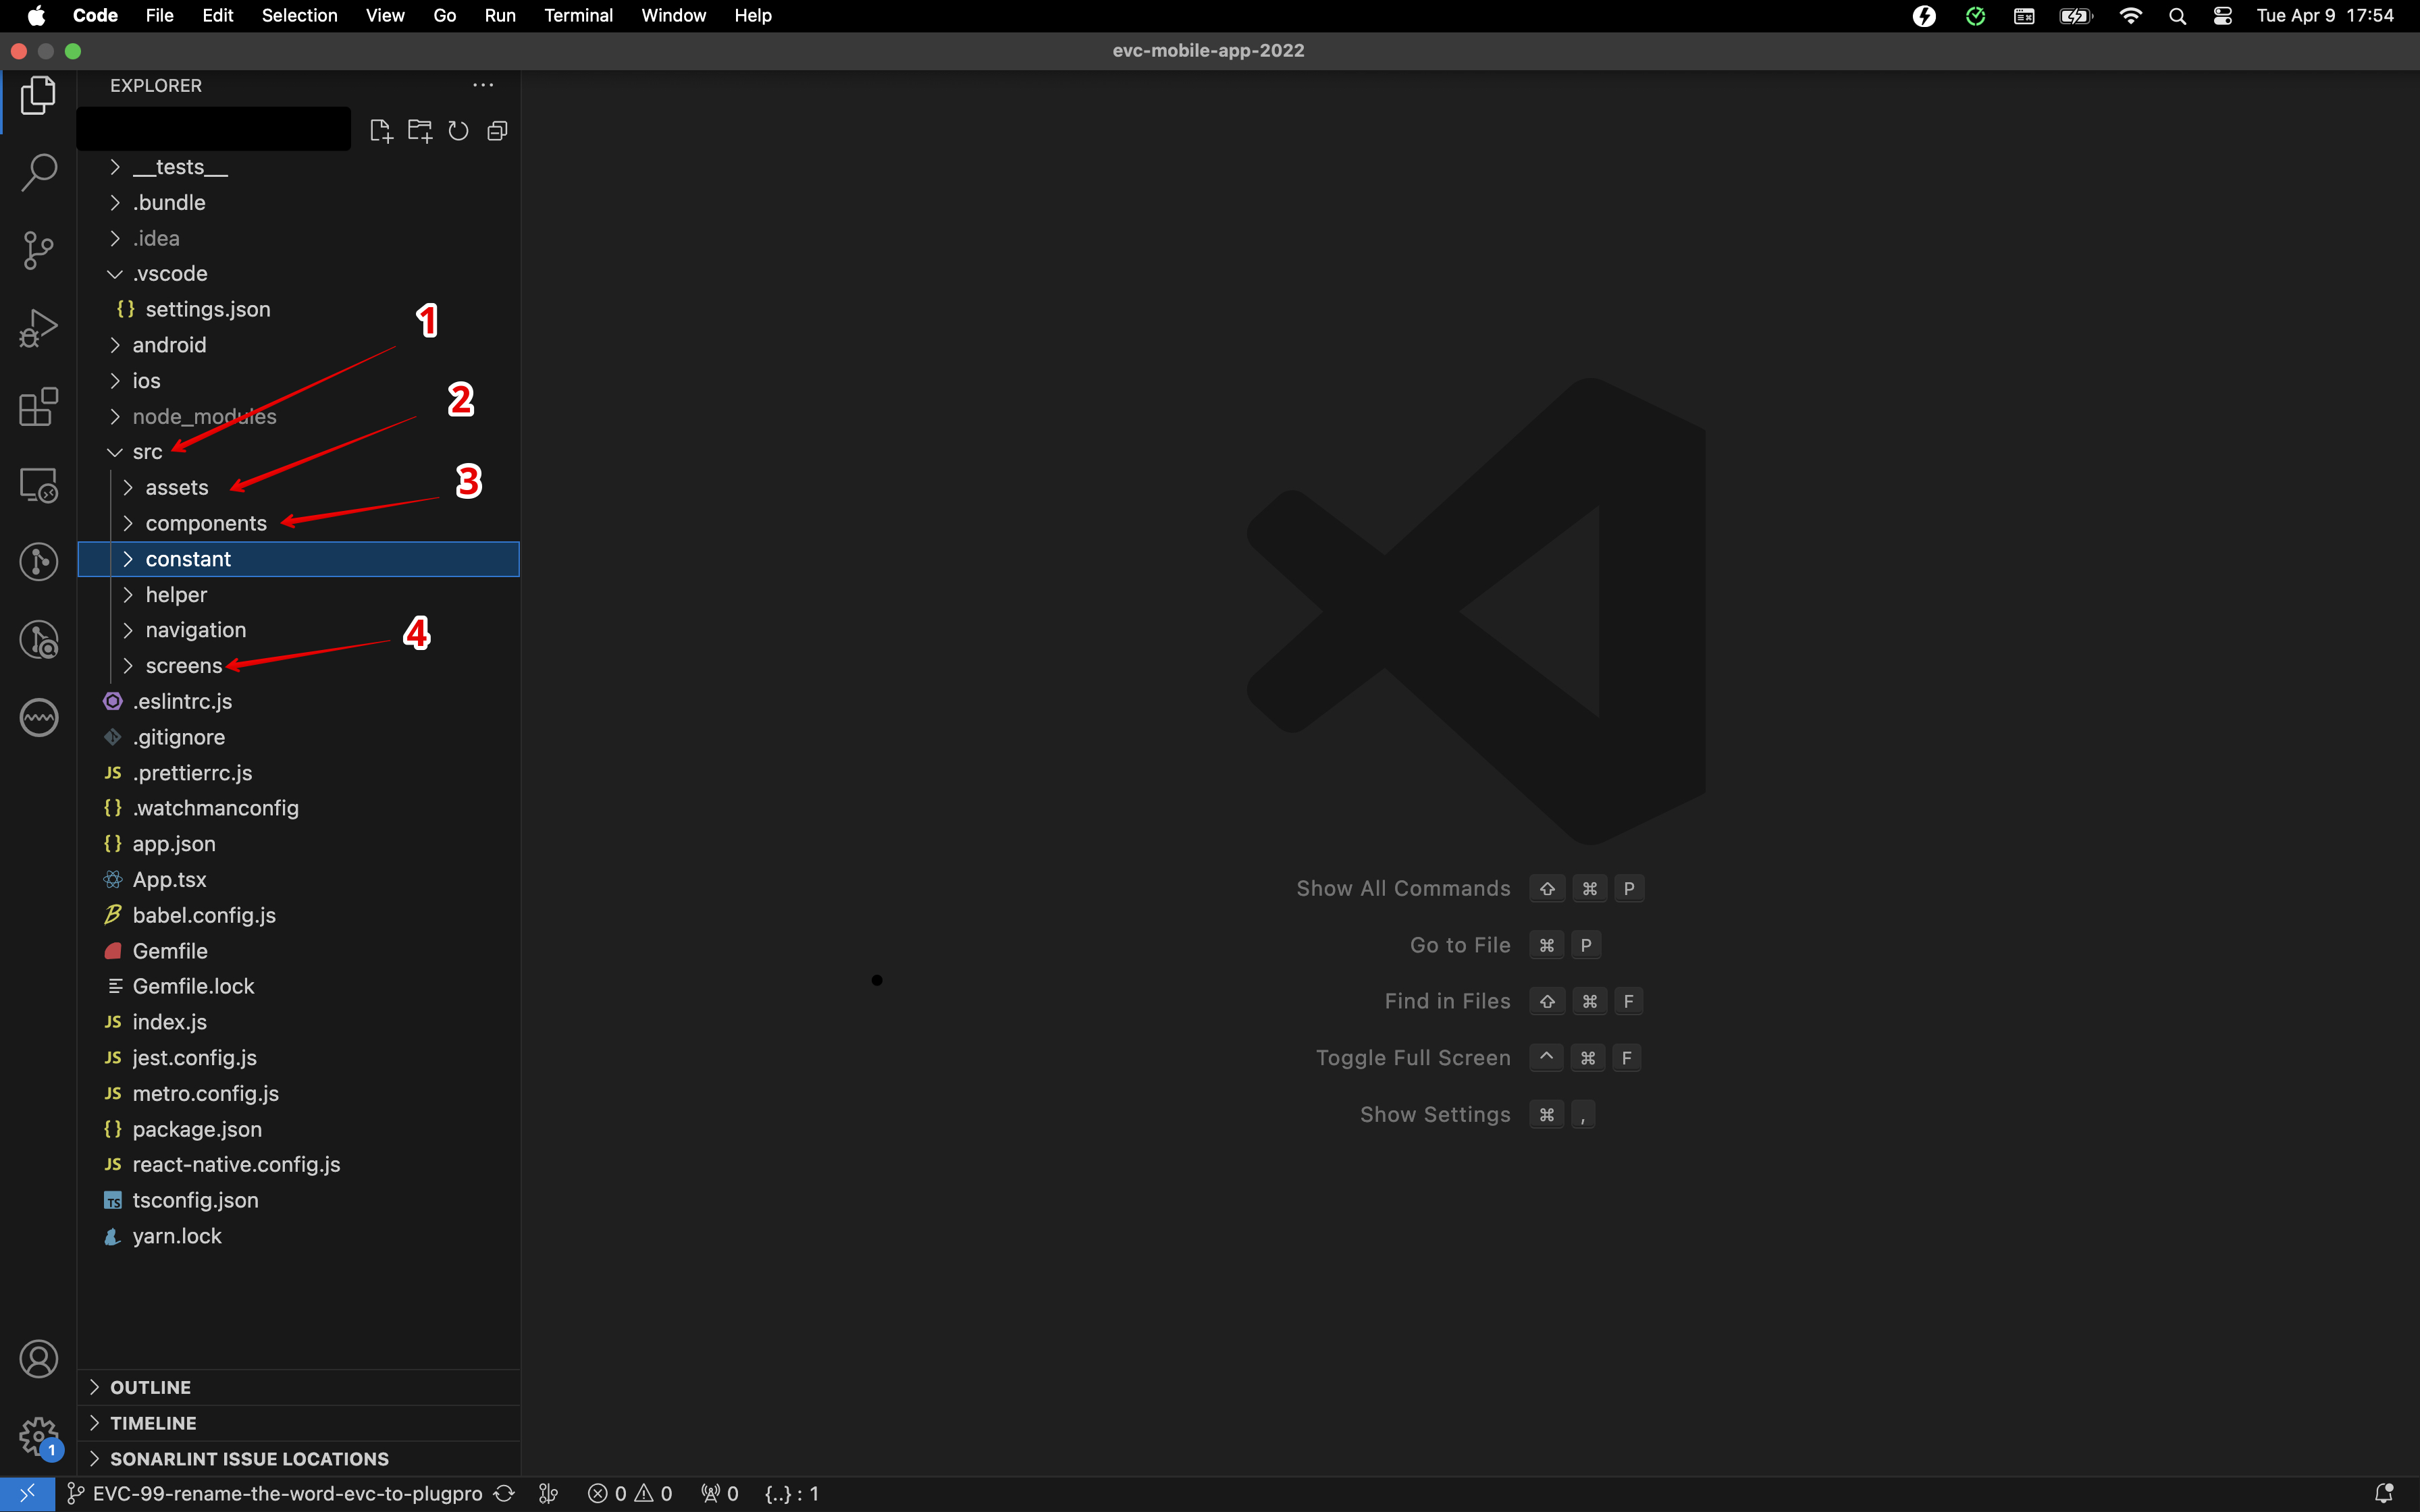
Folder Structure of the Project
Here I share you the folder structure of the project
- src - Here src is the main folder All our work is inside this folder
- assets - inside this folder all the images are in the 'image' folder and the icons are in icons folder
- component - this folder is for component
- Screens - this folder contains all the main screen
Replace provided images
To change image for your app go to {project-folder} and then navigate to this folder: 'src/assets/images' and find these image files which are in .PNG format
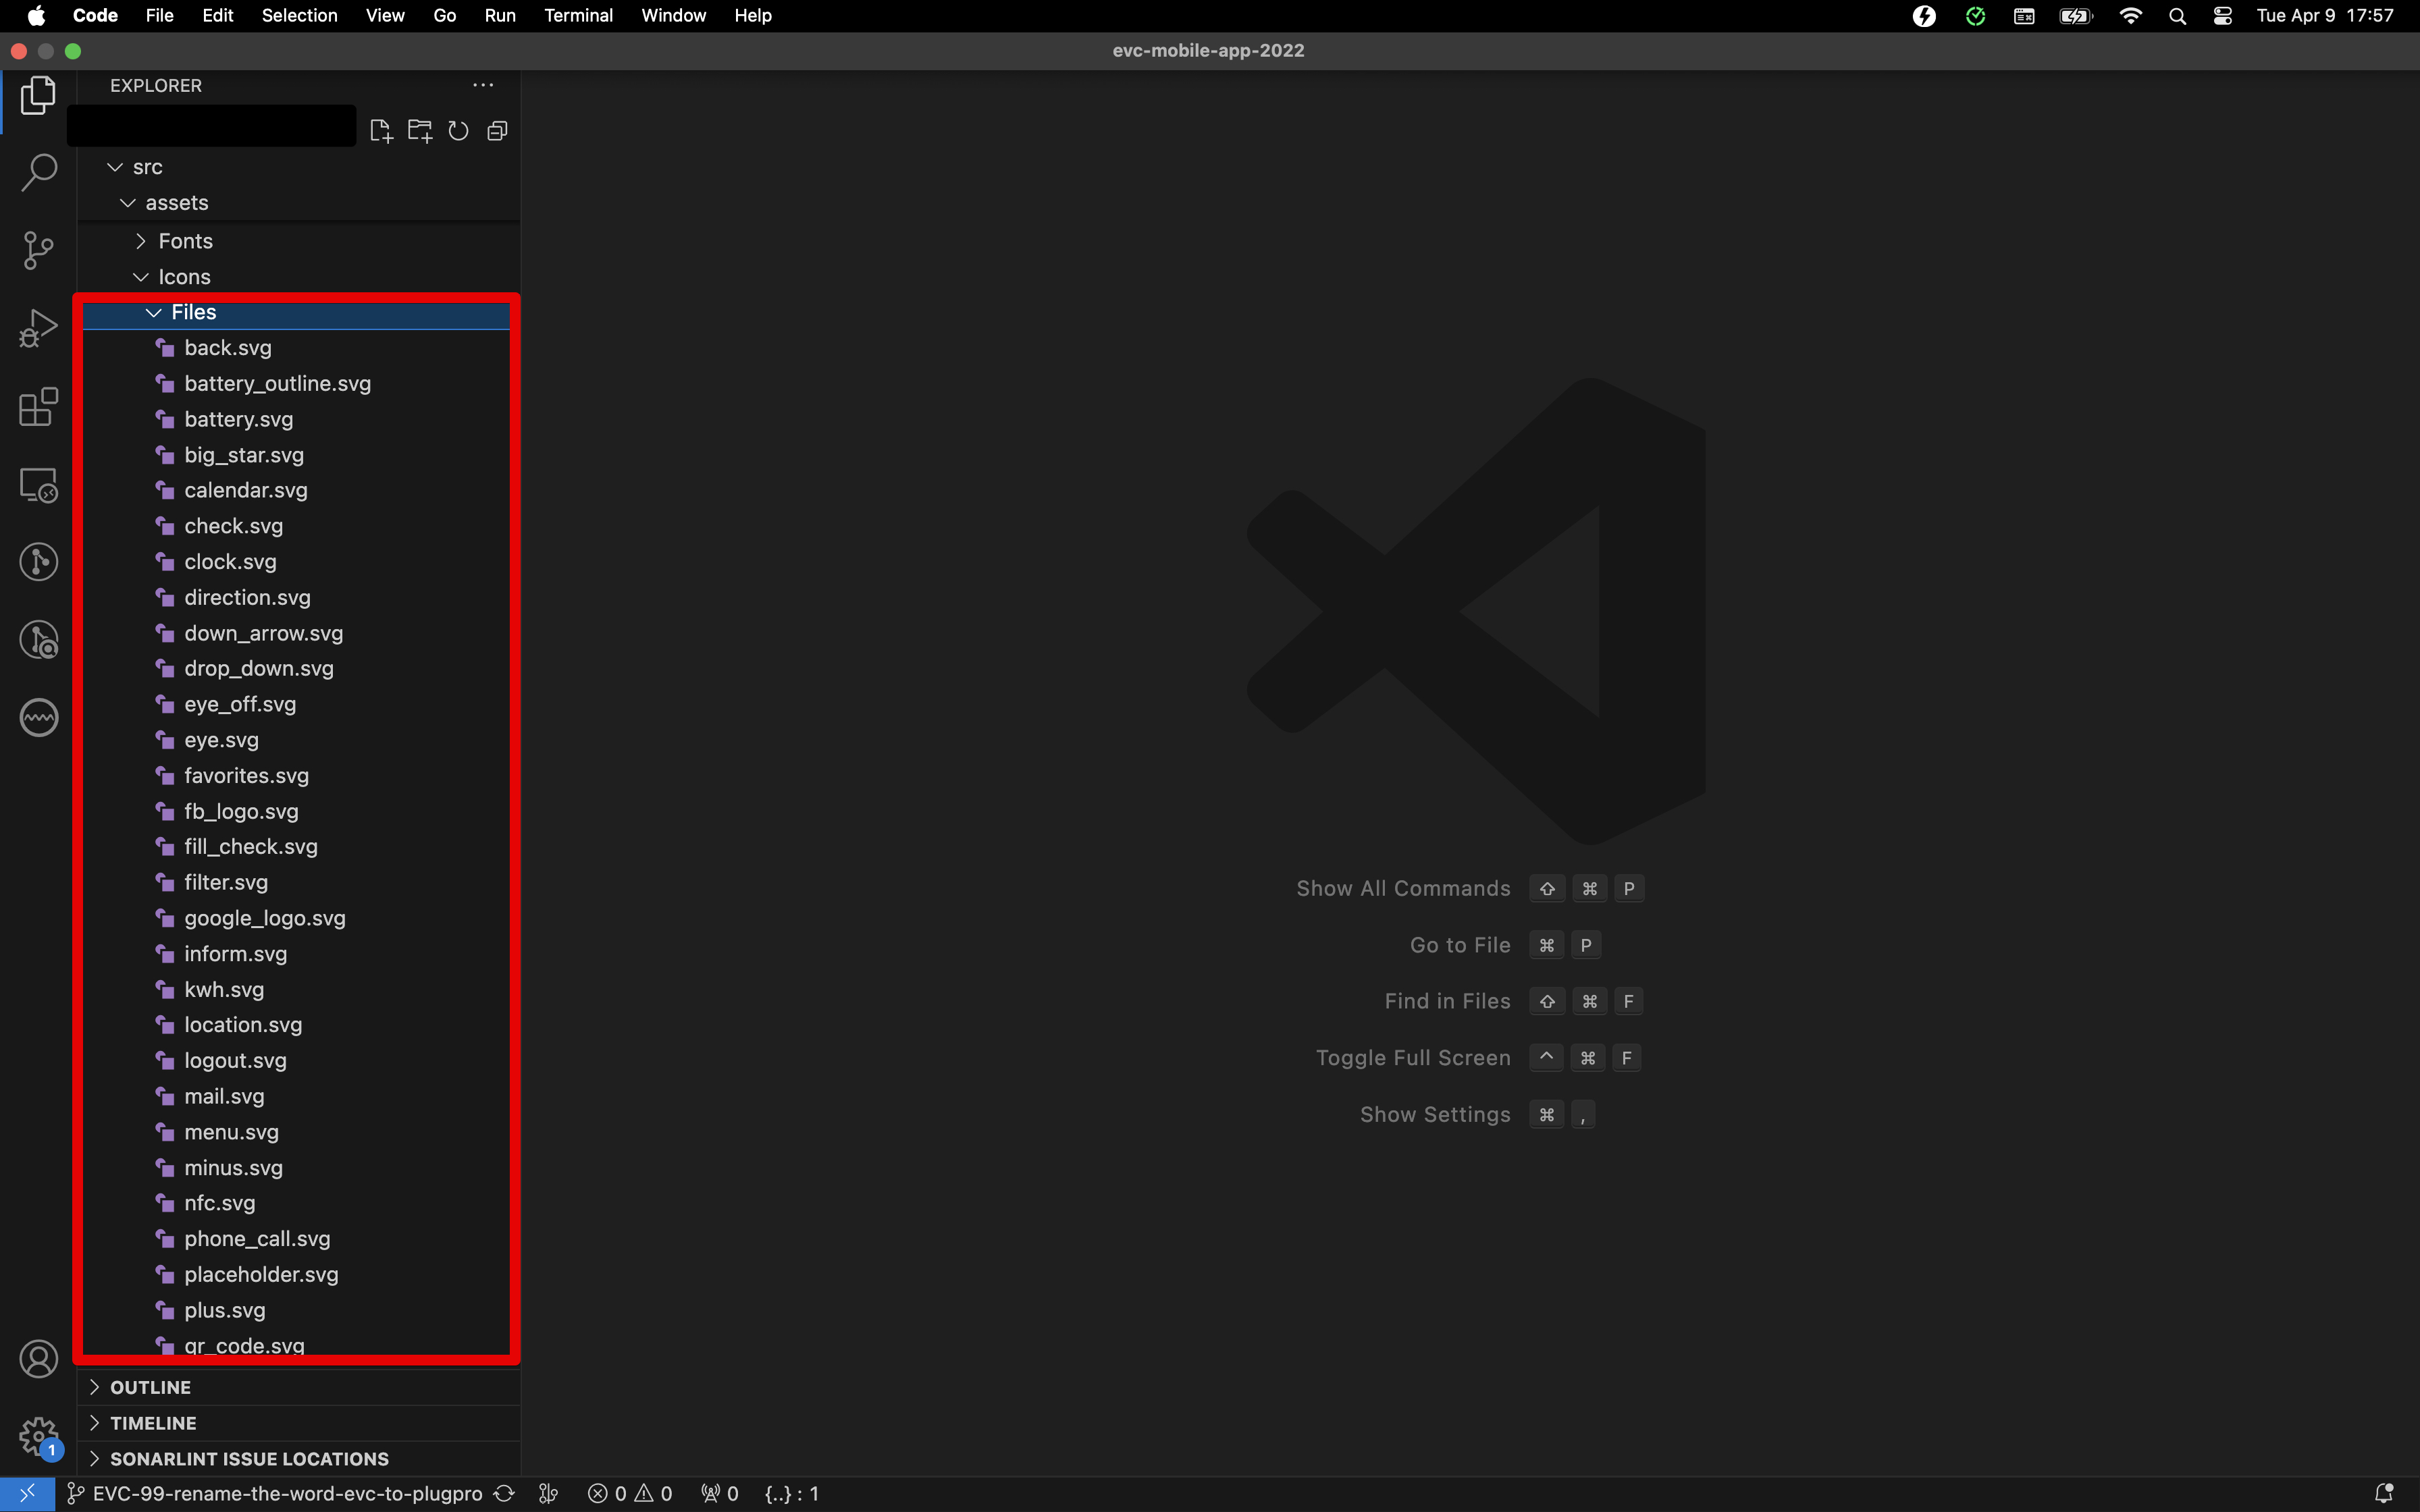
Create new svg icon
If you need any icon for this application then first crop or download an image with (.svg format) then keep the image inside '{project-folder}/src/assets/icons/files' folder and then add this image inside '{project-folder}/src/assets/icons/index.ts' this file
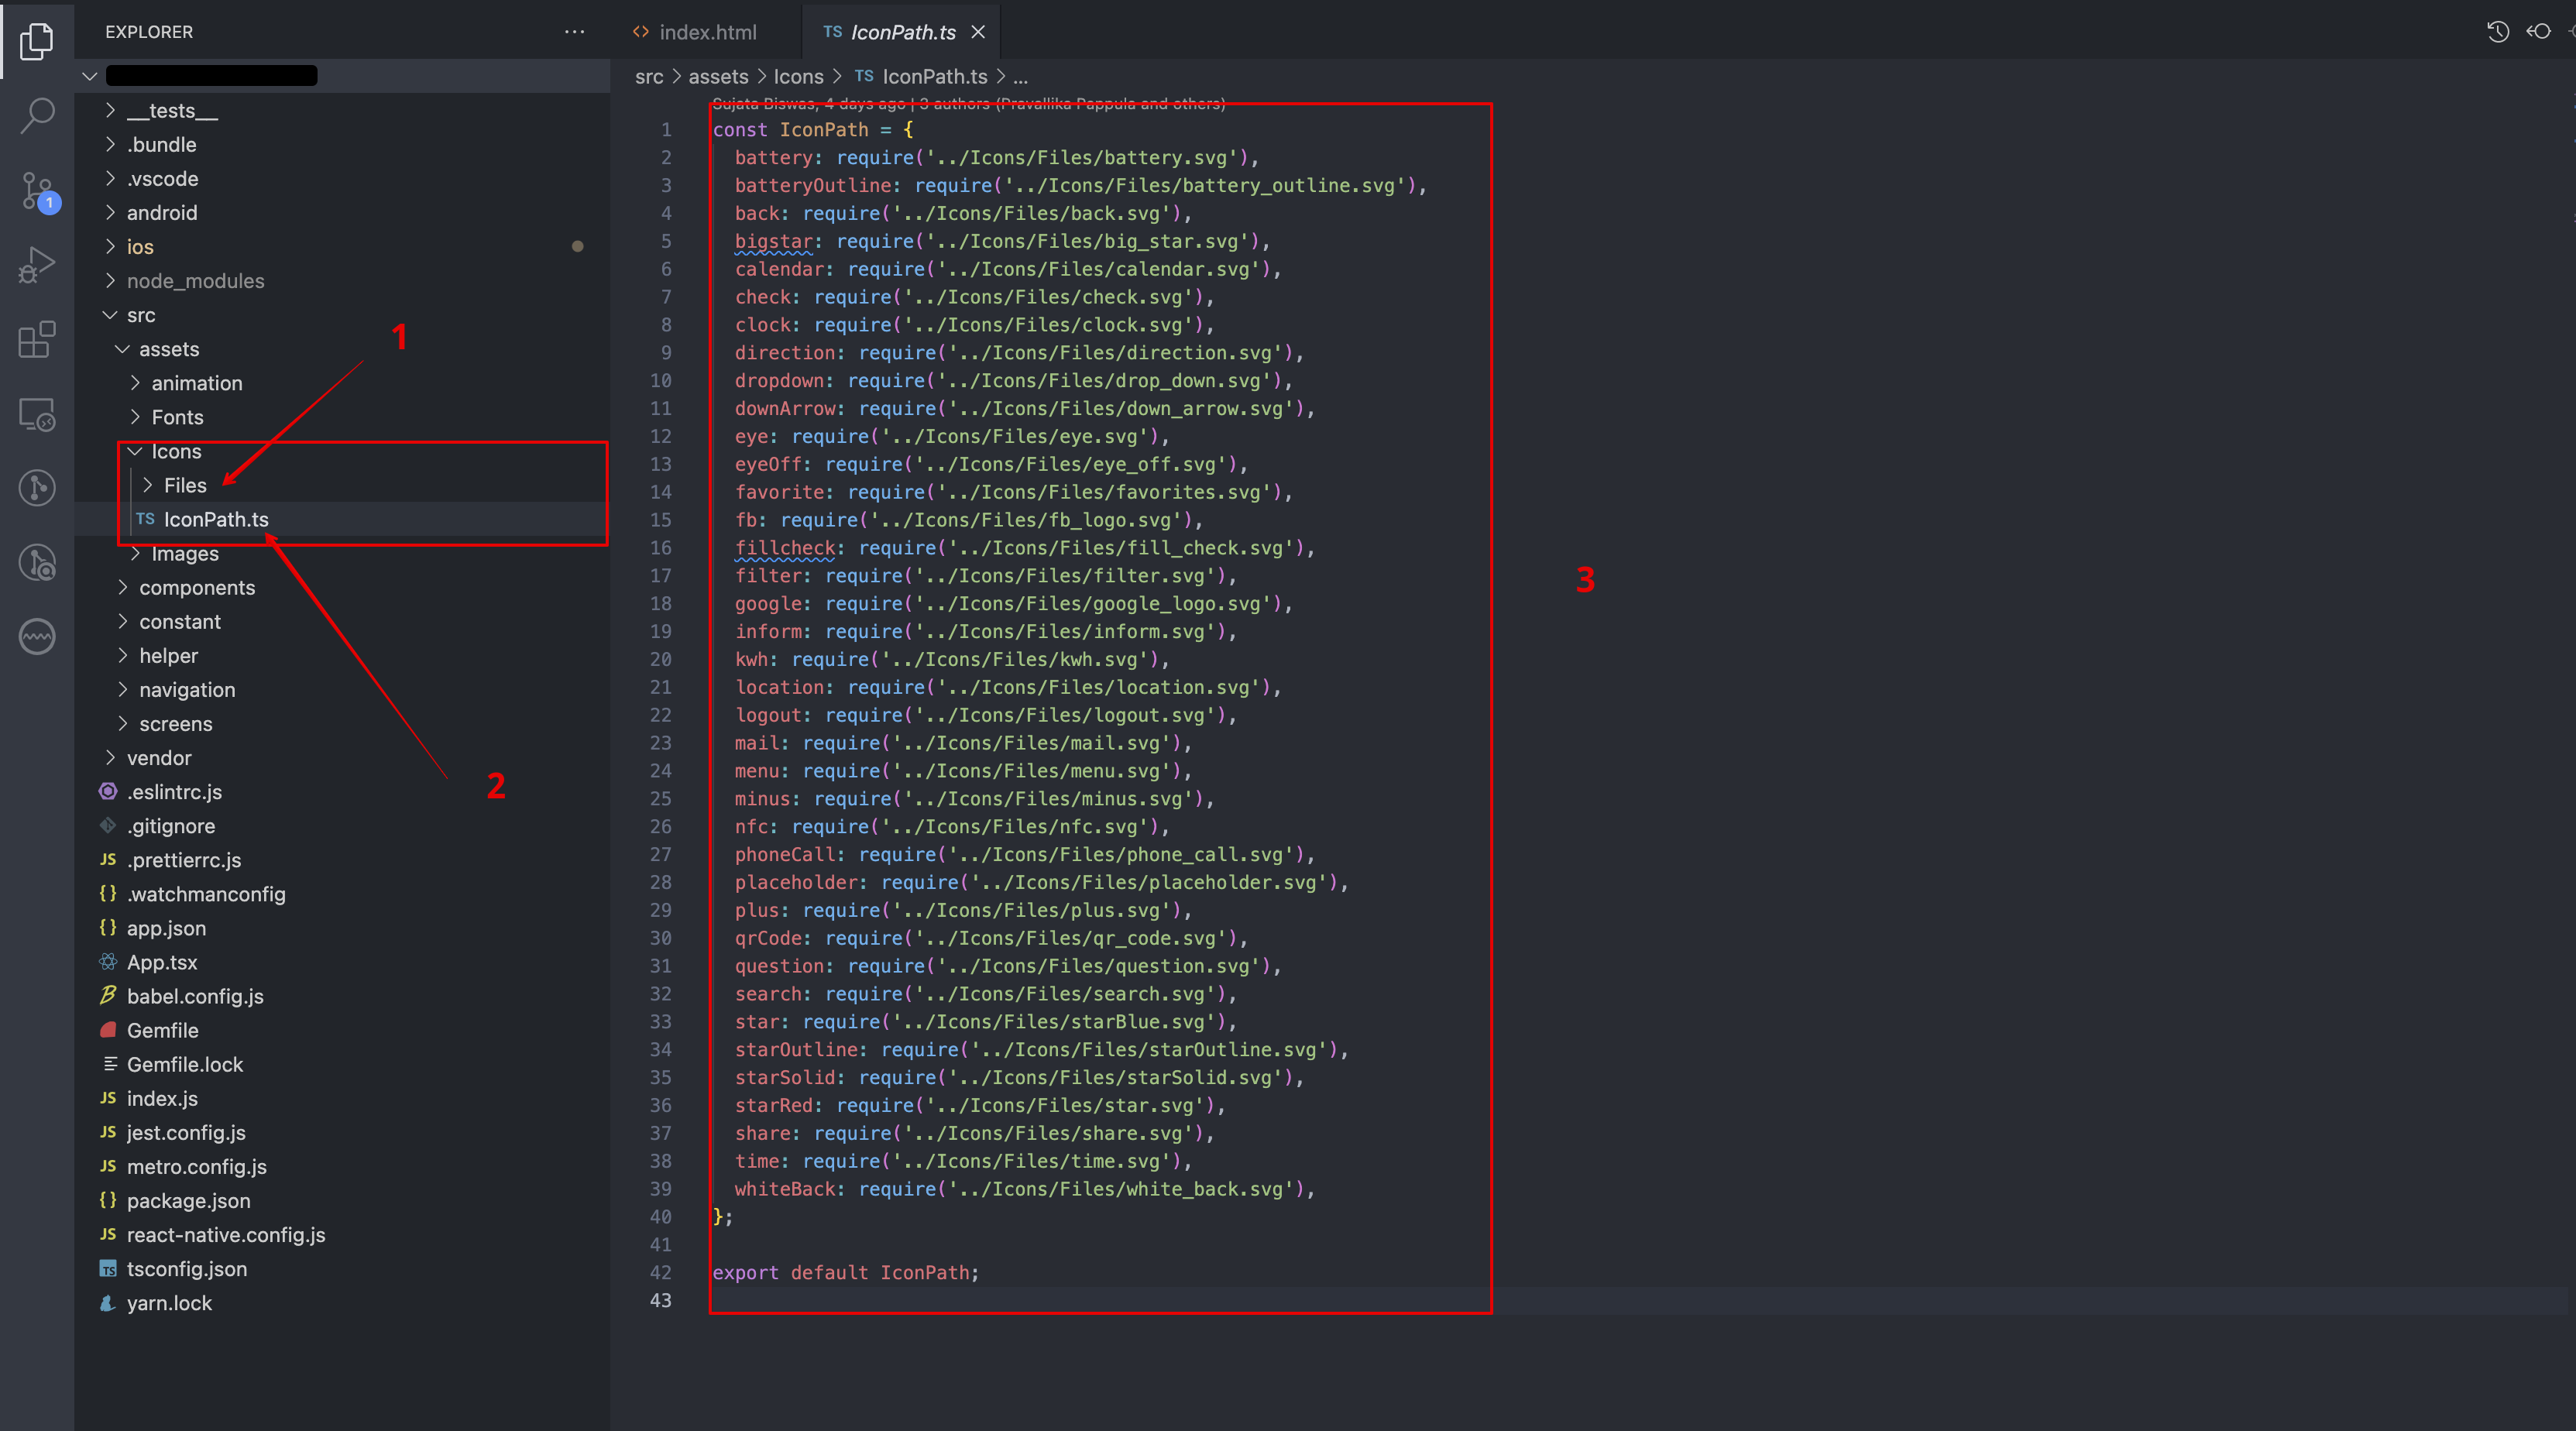
I am adding screenshot here for better understanding
- place the downloaded .svg format image here
- Inside this index.ts file add this image for making icon path
- Take a look How the iconpath is created, do the same way to create the icon
for IOS - open terminal > run
yarn react-native-vector-image generate
Now close the Metro and rebuild your app again
Publishing
Google Play
Check out here to make your app publishing ready for Google Play Store https://reactnative.dev/docs/signed-apk-android
Apple Store
To make your app ready to publish to App Store follow tutorials in this video https://reactnative.dev/docs/running-on-device#building-your-app-for-production
Signing Certification
Generate a Code Signing Certificate for Android
Signing Certificate using Android Studio
For windows
- Click on Build > Generate Signed APK.
- You will get a message box, just click OK.
- Now there will be another window just copy Key Store Path.
- Now open a command prompt and go to C:\Program Files\Java\jdk1.6.0_39\bin> (or any installed jdk version).
- Type keytool -list -v -keystore and then paste your Key Store Path (Eg. C:\Program Files\Java\jdk1.6.0_39\bin>keytool -list -v -keystore "{path_to_your_folder}\Android\android studio\signed apks\{your_project}\HelloWorld.jks").
- Now it will Ask Key Store Password, provide yours and press Enter to get your SHA1 and MD5 Certificate keys.
For mac
- Open Android Studio
- Open Your Project
- Click on Gradle (From Right Side Panel, you will see Gradle Bar)
- Click on Refresh (Click on Refresh from Gradle Bar, you will see List Gradle scripts of your Project)
- Click on Your Project (Your Project Name form List (root))
- Click on Tasks
- Click on android
- Double Click on signingReport (You will get SHA1 and MD5 in Run Bar)
Signing Certificate using Terminal
For windows
keytool -exportcert -alias androiddebugkey -keystore [PATH_TO_.ANDROID_DIRECTORY] -list -v
For mac/linux
keytool -list -v -keystore ~/.android/debug.keystore -alias androiddebugkey -storepass android -keypass android
Generate a Code Signing Certificate for iOS
Generate a Code Signing Certificate using Xcode https://ioscodesigning.com/generating-code-signing-files/
Credits
Thank you so much for purchasing this app!
Regards,
Wordpress Studio Team